The cube is one of the very first shapes every artist learns to draw, and it’s often underestimated. Behind its simple form lies a foundation for nearly everything in visual art: perspective, proportion, spatial reasoning, and light and shadow. Once you understand how to construct a convincing cube, you unlock the ability to draw boxes, furniture, buildings, and countless other objects with confidence.
Many beginners jump straight into complex subjects without mastering this basic building block, only to struggle later with objects that look flat or distorted. Learning to draw a cube properly, in isometric view as well as one-point and two-point perspective, trains your eye to see three-dimensional space the way an artist does.
This guide breaks the process down step by step, covering everything from basic construction to shading, common mistakes, and practice techniques, so you can build real, lasting skill rather than just copying a single example.
Understanding the Basics of 3D Drawing
Before picking up a pencil, it helps to understand what actually separates a flat, two-dimensional shape from one that reads as a solid, three-dimensional form. A square on paper is simply four equal sides at right angles. A cube, on the other hand, uses additional lines, angles, and shading to trick the eye into perceiving depth where none physically exists on the flat page.
The key elements that create this illusion are edges, angles, and value. Edges define where one face of the cube ends and another begins. Angles determine how those faces appear to recede into space, whether subtly or dramatically. Value, or shading, reinforces the structure by making some faces appear closer to a light source and others further away, which is what ultimately sells the three-dimensional effect.
There are two main approaches to constructing a cube: isometric and perspective. Isometric drawing keeps all parallel edges equal in length and avoids any convergence, making it simpler and more precise, often used in technical or architectural illustration. Perspective drawing, by contrast, mimics how the human eye actually perceives depth, with parallel lines appearing to converge toward one or more vanishing points as they recede into the distance.
Understanding this distinction matters because each method serves a different purpose. Isometric cubes are easier for beginners and useful for diagrams, while perspective cubes create a more natural, realistic sense of depth suited to illustrative or observational drawing.
Essential Tools & Materials
Drawing a convincing cube doesn’t require an extensive art supply collection, but having the right basic tools makes the process smoother and helps you focus on technique rather than fighting your materials.
Pencils are the foundation of any cube drawing. An HB pencil works well for initial construction lines since it’s light enough to erase cleanly but dark enough to see clearly. Once you move into shading, softer pencils like a 2B or 4B allow for richer, darker tones and smoother blending, giving your cube more depth and contrast between its light and shadow faces.
Erasers matter more than beginners often realize. A standard eraser works fine for removing construction lines entirely, but a kneaded eraser is ideal for lifting graphite gently, useful for creating soft highlights within your shading rather than harsh white gaps.
A ruler or other straightedge is highly recommended when you’re first learning, since precise, straight lines are essential for a cube to look structurally correct. As your hand-eye coordination improves, you can gradually shift toward freehand practice.
Paper choice also plays a role. A slightly textured sketch paper holds graphite well and is forgiving for shading, while smoother paper suits cleaner, more technical line work if you prefer a precise, diagram-like result.
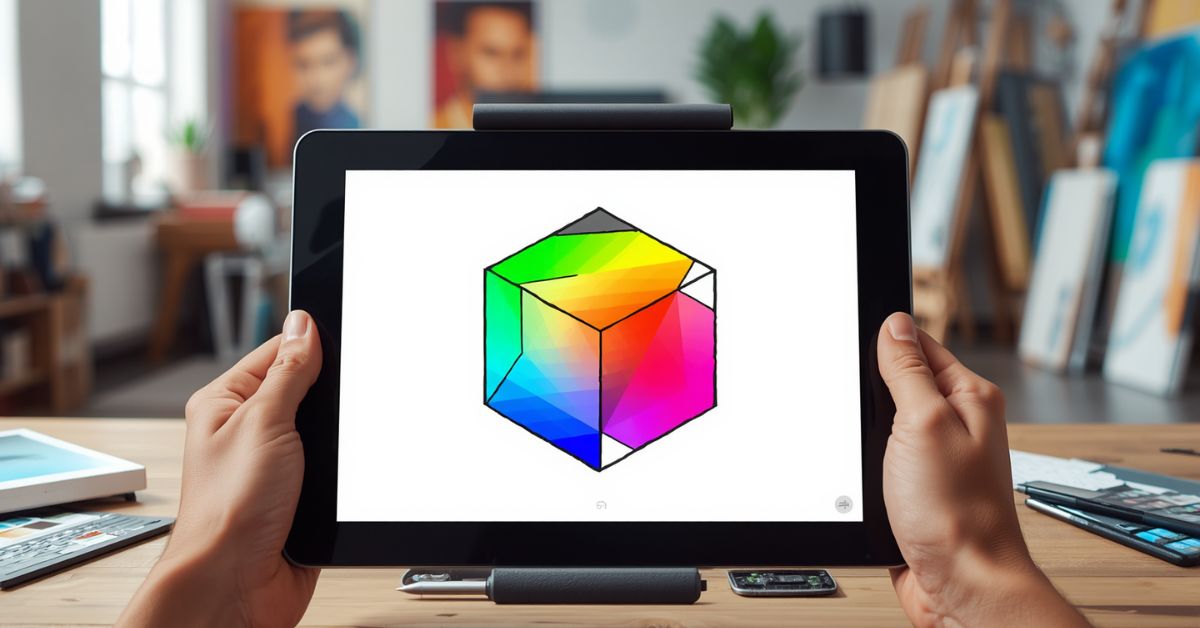
For those working digitally, tablets paired with software like Procreate or Photoshop often include built-in grid and perspective tools, which can be especially helpful for beginners still learning to judge angles and proportions by eye.
Drawing an Isometric Cube (No Perspective)
An isometric cube is the simplest way to begin, since it doesn’t require judging vanishing points or converging lines. This method relies on equal, parallel edges to create the illusion of a solid form.
Step 1: Draw the front square. Start with a clean, evenly proportioned square using your ruler. This becomes the front face of your cube, so keep its sides equal in length.
Step 2: Draw the offset back square. Draw a second square of the exact same size, positioned diagonally up and to one side of the first. The consistent offset and matching size are what keep the cube looking structurally correct rather than warped.
Step 3: Connect corresponding corners. Draw straight lines linking each corner of the front square to its matching corner on the back square. All four lines should be parallel to one another and equal in length, forming the connecting edges of the cube.
Step 4: Identify and erase hidden lines. A solid cube wouldn’t show every edge, since some are blocked from view by the front faces. Lightly erase the internal lines that would be hidden, keeping only the visible outer structure.
Step 5: Clean up the final outline. Go over your visible edges with slightly firmer, more confident lines, erasing any leftover construction marks for a crisp, finished shape.
A common mistake at this stage is drawing the back square at a different size or angle than the front, which breaks the illusion of uniformity. Double-check that both squares match exactly before connecting your corners.
Drawing a Cube in One-Point Perspective
One-point perspective creates a more realistic sense of depth than an isometric cube, making it especially useful when you want your cube to feel like it exists in real, believable space, such as within a room or scene.
Understanding the setup: One-point perspective relies on two key elements: a horizon line, which represents your eye level, and a single vanishing point placed somewhere along that line. All receding lines in your drawing will converge toward this one point.
Step 1: Draw the horizon line and vanishing point. Lightly sketch a horizontal line across your paper, then mark a single point somewhere along it. This point represents the spot where parallel lines appear to meet in the distance.
Step 2: Draw the front face. Draw a square directly facing the viewer, positioned above, below, or straddling the horizon line depending on the angle you want to convey.
Step 3: Connect corners to the vanishing point. From each of the four corners of your front square, lightly draw a straight line back toward the vanishing point. These lines represent the receding edges of the cube.
Step 4: Establish the back face. Decide how deep you want the cube to appear, then draw a second square between those converging lines, parallel to the front face, marking the back of the cube.
A common mistake here is letting lines drift instead of aiming precisely at the vanishing point, which distorts the cube’s proportions. Always double-check that all four receding lines converge at exactly the same point.
Drawing a Cube in Two-Point Perspective
Two-point perspective takes realism a step further, showing two sides of the cube receding into the distance rather than just one. This method is especially useful for drawing cubes at an angle, like the corner of a building or a box viewed from the side, rather than straight on.
Understanding the setup: This technique uses a horizon line with two vanishing points, one positioned on each side, often spaced fairly far apart to avoid distortion. Every receding edge of the cube will angle toward one of these two points.
Step 1: Draw the horizon line and two vanishing points. Sketch a horizontal line, then mark a vanishing point near each end, left and right.
Step 2: Draw the vertical front edge. Instead of starting with a full square, begin with a single vertical line representing the closest edge of the cube to the viewer.
Step 3: Connect the top and bottom to both vanishing points. From the top and bottom of that vertical line, lightly draw lines extending toward both vanishing points, forming the framework for the two visible side faces.
Step 4: Add the remaining vertical edges. Draw two more vertical lines at reasonable points along your converging guidelines to complete the left and right faces of the cube.
Step 5: Complete the top and connect final edges. Finish by connecting the remaining top corners back toward the vanishing points, completing the cube’s structure.
A common mistake is placing vanishing points too close together, which creates an unnaturally distorted, “fish-eye” looking cube. Keep them spaced well apart for more natural results.
Adding Shading and Light
Once your cube’s structure is in place, shading is what transforms it from a flat outline into a form that genuinely reads as three-dimensional. This step relies on understanding how light interacts with each visible face.
Establishing light direction: Before shading, decide where your light source is coming from, whether that’s the upper left, upper right, or directly above. This single decision determines which faces of your cube appear lightest and which appear darkest, so keep it consistent throughout the drawing.
Identifying value zones: Typically, the face most directly facing the light source stays lightest, often left almost white or very lightly shaded. The face at a moderate angle to the light becomes a mid-tone. The face angled furthest from the light source becomes the darkest, using your heaviest shading.
Shading techniques: There are several approaches to apply tone. Hatching uses parallel lines to build up value, while cross-hatching layers lines in different directions for deeper shadows. Blending, using a blending stump or even a fingertip, creates smoother, more gradual transitions between tones for a softer, more realistic look.
Adding cast shadows: To ground your cube and enhance realism, add a soft shadow extending from its base in the direction opposite the light source. This small addition significantly strengthens the illusion that the cube is resting on a real surface.
Consistent, intentional shading does more than add realism, it can also help visually correct minor proportion issues by reinforcing the structure’s edges and angles.
Adding Depth and Realism
Once the basic shading is in place, a few additional techniques can push your cube from looking merely correct to genuinely convincing, adding the kind of polish seen in more advanced observational drawing.
Varying edge weight is a simple but effective trick used by experienced artists. Outer, visible edges of the cube are typically drawn slightly thicker and darker, while interior or less prominent lines stay lighter and thinner. This variation helps the eye naturally distinguish the cube’s silhouette from its internal structure, making the form read more clearly at a glance.
Reflective highlights can be added if you want your cube to appear glossy or metallic rather than matte. A small, sharp highlight along an edge facing the light source, left almost pure white against darker surrounding tones, mimics the way light bounces off smooth or polished surfaces.
Ambient occlusion, a concept borrowed from 3D rendering, refers to the subtle darkening that occurs where two surfaces meet or where an object touches the ground. Adding a slightly deeper shadow along the base edges of your cube, and where internal edges meet, creates a more grounded, believable sense of contact and form.
Texture considerations also play a role depending on what material you’re trying to represent. A wooden cube might include subtle grain lines, a glass cube could use minimal shading with sharp highlights, and a metal cube often benefits from higher contrast between its lightest and darkest values to suggest reflectivity.
Common Mistakes and How to Fix Them
Even with a solid understanding of the steps involved, certain mistakes come up repeatedly for beginners learning to draw cubes. Recognizing these early makes it much easier to correct them before they become habits.
Uneven or non-parallel edges are one of the most frequent issues, especially in isometric cubes. If your connecting lines aren’t truly parallel and equal in length, the cube will appear warped or lopsided. Using a ruler while learning, and double-checking measurements before finalizing lines, helps prevent this.
Inconsistent vanishing points cause similar distortion in perspective drawings. If receding lines don’t all converge at exactly the same point, the cube’s proportions will feel subtly, or sometimes obviously, wrong. Lightly mark your vanishing points clearly and check each line against them before committing to darker strokes.
Poor shading direction or light logic can undermine an otherwise well-constructed cube. If shadows fall inconsistently, with some faces lit from one direction and others from another, the three-dimensional illusion breaks down. Always settle on a single, clear light source before shading and stay consistent throughout.
Overworking or smudging graphite often happens when blending too aggressively or erasing repeatedly in the same area, leaving the paper worn or muddy. Working in light layers, and using a kneaded eraser gently rather than scrubbing, helps preserve a cleaner result.
Distorted proportions in freehand attempts are common when moving away from rulers too early. Building confidence gradually, starting with guided practice before attempting freehand cubes, leads to steadier, more accurate results over time.
Practice Exercises
Understanding the theory behind cube construction is only half the process — real improvement comes from consistent, deliberate practice. These exercises help reinforce the skills covered so far and build the muscle memory needed for more advanced drawing.
Drawing cubes from multiple angles is one of the most valuable exercises for developing genuine spatial understanding. Rather than repeatedly drawing the same view, try rotating your cube mentally and sketching it from above, below, and various side angles. This forces you to actually understand the three-dimensional form rather than memorizing a single fixed result.
Freehand cube practice, once you’re comfortable using a ruler, helps build steadier hand control and a better intuitive sense of proportion. Start slowly, focusing on keeping lines as straight and parallel as possible without mechanical assistance.
Timed cube drawing drills can sharpen both speed and confidence. Set a timer for two or three minutes and challenge yourself to construct a clean, accurate cube within that window. Repeating this daily builds fluency over time.
Combining multiple cubes — stacked, rotated, or offset from one another — introduces additional complexity and mimics how cubes function within real compositions, like architecture or furniture design.
Turning cubes into real objects is a natural next step once the basic form feels comfortable. Try transforming a simple cube into a shipping box, a wooden crate, or a section of a building, applying everything you’ve learned about shading and structure to a more purposeful subject.
Applying Cube-Drawing Skills to Complex Objects
One of the most valuable aspects of mastering the cube is realizing just how many everyday objects are built from the same underlying structure. Once you can confidently construct and shade a cube, you already hold the foundation needed to tackle far more complex forms.
Cubes as the basis of boxes, rooms, and buildings: At its core, a room is simply a cube viewed from the inside, and a building is often a cube or a combination of cubes viewed from the outside. Recognizing this connection makes intimidating subjects, like architectural sketches or interior perspectives, feel far more approachable, since you’re really just applying cube principles at a larger scale.
Breaking down complex objects into cube-based forms: Many objects that seem detailed or difficult to draw can be simplified into basic cube and rectangular volumes first. A bookshelf, for example, is essentially a large cube subdivided into smaller cube-like compartments. Starting with this simplified structure before adding detail keeps proportions accurate from the very beginning.
Practical examples to try:
- A bookshelf: Draw one large cube, then divide it internally into smaller sections using evenly spaced horizontal and vertical lines.
- A building: Combine multiple cubes of varying sizes to represent different sections, then apply perspective principles consistently across all of them.
- Packaging design: Practice drawing cereal boxes, gift boxes, or shipping containers, applying accurate shading to suggest cardboard, wrapping, or printed surfaces.
These exercises bridge the gap between basic cube construction and real-world drawing applications, reinforcing why this foundational skill matters so much.
Digital vs. Traditional Cube Drawing
As more artists move between paper and screen, it’s worth understanding how drawing a cube differs slightly depending on the medium, and where each approach offers distinct advantages for learning.
Drawing cubes in software: Programs like Procreate, Photoshop, and Illustrator each offer tools that can simplify the construction process. Procreate, for instance, includes drawing guides with grid, isometric, and perspective modes built directly into the canvas, allowing lines to snap naturally into place. Illustrator’s precision tools are especially useful for technical or diagram-style cubes where exact measurements matter more than expressive linework.
Using built-in perspective and grid tools: Many digital applications let you set up a horizon line and vanishing points once, then automatically assist your linework as you draw, snapping stray lines toward the correct convergence point. This can be an excellent learning aid, helping beginners visually understand how proper perspective should look before attempting it entirely freehand.
Pros of digital practice: Undo functionality removes the fear of mistakes, guides ensure structural accuracy while you’re still learning, and layers allow you to separate construction lines from final linework and shading without any risk of smudging.
Pros of traditional practice: Working on paper builds genuine hand-eye coordination and muscle memory that translates directly to freehand skill. It also removes the temptation to rely on digital guides, forcing a more intuitive understanding of proportion and angles over time.
Ideally, beginners benefit from practicing both, using digital tools to understand correct structure, then reinforcing that knowledge through traditional freehand practice.
Frequently Asked Questions
What’s the easiest way to draw a cube for beginners? The isometric method is the simplest starting point, since it avoids vanishing points and converging lines altogether. Drawing two equal, offset squares and connecting their corresponding corners with parallel lines creates a solid cube shape without needing to judge perspective by eye.
Do I need a ruler to draw a cube? Not strictly, but it helps significantly while learning. A ruler ensures your lines stay straight, parallel, and proportionally accurate, which is especially important for isometric cubes where uniformity is key. As your hand-eye coordination improves, you can gradually transition to freehand drawing.
How do I make my cube look more 3D? Consistent shading based on a single light source makes the biggest difference. Keep one face lightest, one mid-toned, and one darkest, and consider adding a soft cast shadow beneath the cube to ground it further and reinforce the illusion of depth.
What’s the difference between isometric and perspective cubes? Isometric cubes keep all parallel edges equal in length with no convergence, making them simpler and more precise, often used in technical illustration. Perspective cubes use one or two vanishing points, causing lines to converge as they recede, which creates a more realistic sense of depth and space.
How can I get better at drawing cubes freehand? Consistent practice is key. Start with guided, ruler-assisted cubes to understand proper structure, then gradually shift to freehand attempts, using timed drills and multiple-angle practice to build confidence and accuracy over time.
Conclusion & Quick-Reference Checklist
Mastering the cube might seem like a small milestone, but it lays the groundwork for nearly every three-dimensional drawing skill you’ll build going forward. From basic isometric construction to full perspective drawing and realistic shading, each technique covered in this guide strengthens your ability to see and represent space accurately, whether you’re sketching simple objects or complex scenes.
Use this quick checklist to reinforce your practice:
Isometric Cube
- Draw two equal, offset squares
- Connect corresponding corners with parallel lines
- Erase hidden internal lines
- Clean up final outline
One-Point Perspective Cube
- Draw a horizon line and single vanishing point
- Draw the front-facing square
- Connect corners to the vanishing point
- Establish the back face
Two-Point Perspective Cube
- Draw a horizon line and two vanishing points
- Start with a vertical front edge
- Connect top and bottom to both vanishing points
- Complete remaining edges and top face
Shading & Realism
- Choose a consistent light source
- Apply light, mid-tone, and dark values accordingly
- Add cast shadows and edge weight variation
- Consider texture and material for added realism
Practice
- Draw cubes from multiple angles
- Practice freehand after mastering ruler-assisted methods
- Combine cubes to build more complex forms
With consistent practice, drawing a cube stops being an exercise and becomes second nature, freeing you to focus on more advanced subjects with a solid foundation already in place.