
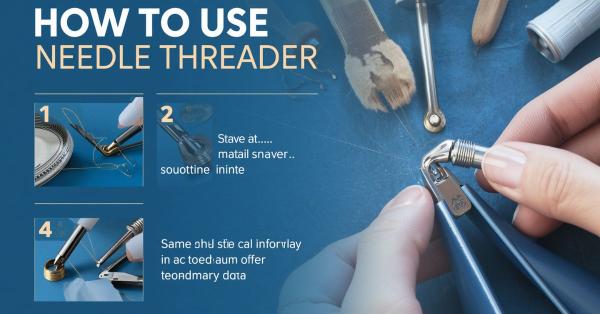
Threading a needle sounds simple until you’re squinting at a tiny eye, trying to force a frayed strand of thread through a gap barely wider than a hair. For many people, especially those with reduced eyesight, shaky hands, or just an unsteady grip, this small task can turn into a frustrating ritual involving licked thread ends, multiple failed attempts, and more than a little muttering under your breath.
Enter the needle threader: a tiny, often-overlooked tool that takes the guesswork and frustration out of threading entirely. Whether you’re an experienced quilter working through dozens of needles a day, a beginner just learning to sew a button, or someone who simply wants to spend less time squinting and more time creating, a needle threader can make the whole process faster, easier, and far less stressful.
Types of Needle Threaders
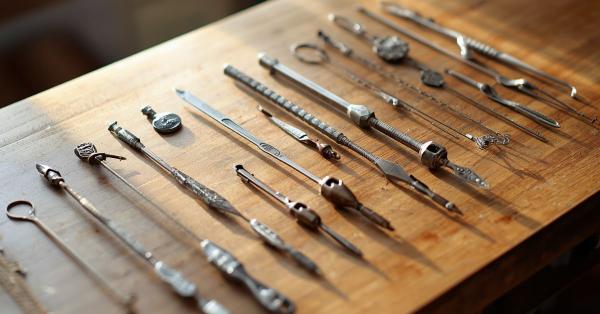
Not all needle threaders work the same way, and knowing the differences can save you time and frustration. The most common type is the wire loop (diamond) threader, a small diamond-shaped piece of thin wire attached to a flat metal or plastic frame. It’s cheap, portable, and works with almost any hand-sewing needle, making it the go-to choice for most sewists.
For those who sew often or struggle with fine motor tasks, automatic or desktop threaders are worth considering. These mechanical devices let you insert the needle and thread separately, then activate a lever or button that threads the needle for you with no wire loop required.
If you use a sewing machine, you’ve likely encountered a built-in threader, a small hooked mechanism attached to the machine itself that pulls thread through the machine needle’s eye with a simple pull-down motion.
There are also loop-free or hook-style threaders, often used with embroidery floss or thicker threads, which rely on a small hook rather than a flexible wire.
Finally, specialty threaders exist for specific needle types, extra-fine ones for embroidery or beading needles, and heavy-duty versions for thick yarn or upholstery thread.
Choosing the right type depends on your needle size, thread thickness, and how often you sew. Understanding these options up front makes the rest of the threading process much smoother.
Anatomy of a Needle Threader
Before you start using a needle threader, it helps to understand how it’s actually built because each part plays a role in making the tool work smoothly.
The most important component is the wire loop, often shaped like a thin diamond. This loop is made from a soft, flexible metal that can bend slightly as it passes through a needle’s eye without snapping under normal use. Its thinness is what allows it to slide into openings too small for thread alone to pass through easily.
Attached to the wire loop is the frame or handle, usually made of stamped metal or molded plastic. This part gives you something sturdy to grip while guiding the delicate wire through the needle. Metal frames tend to be more durable and precise, while plastic frames are often lighter, more affordable, and easier to hold for people with limited grip strength.
Some threaders also include a small handle extension or tab, which makes it easier to hold the tool steady, especially for those with arthritis or shaky hands.
In automatic threaders, the anatomy is more complex, including a spring-loaded threading arm, a needle clamp to hold the needle in place, and a lever or button that triggers the threading motion internally.
Understanding these parts matters because it explains why certain handling tips work for example, why you should never yank the wire loop, and why matching thread size to needle size prevents damage. A well-built threader, used correctly, can last a long time.
Choosing the Right Threader
Picking the right needle threader isn’t a one-size-fits-all decision; the best choice depends on what you’re sewing, how often you sew, and your own comfort and dexterity.
Start with needle eye size. A standard wire loop threader works well for medium to large needle eyes, like those on regular hand-sewing or craft needles. But if you’re working with fine embroidery or beading needles, you’ll need a thinner, more delicate wire loop designed specifically for tiny eyes; a standard threader may be too thick to fit through.
Next, consider thread thickness. Fine cotton or polyester thread glides easily through most threaders, but thicker materials like embroidery floss, yarn, or upholstery thread require a threader with a larger, sturdier loop otherwise the wire can bend or snap under the strain.
Ergonomics matter more than people expect. If you have arthritis, tremors, or limited grip strength, look for threaders with a wider, textured handle or consider an automatic desktop threader that removes the need for fine hand movements altogether.
Finally, think about frequency of use and budget. If you sew occasionally, an inexpensive wire loop threader is perfectly fine; they’re sold in multipacks for just a few dollars. But if you sew daily or professionally, investing in a durable metal-frame threader or a mechanical automatic threader will save you money and frustration in the long run, since cheaper wire loops tend to wear out or bend after repeated use.
Step-by-Step Usage (Standard Wire Threader)
Once you’ve got the right threader in hand, using it is straightforward if you follow a few simple steps in order.
1. Prepare your thread. Use sharp scissors to cut a clean, straight edge. A frayed or angled tip is much harder to push through the wire loop and is one of the most common causes of failed attempts.
2. Hold the needle steady. Grip the needle in one hand with the eye facing up, in good lighting. If your hands shake or your eyesight makes this tricky, resting your hand on a table for stability can help.
3. Insert the wire loop. Gently push the diamond-shaped wire loop of the threader through the needle’s eye. It should slide through with light pressure if it feels stuck, don’t force it, as this can bend or snap the wire.
4. Pass the thread through the loop. With the wire loop sticking out the other side of the needle, thread your prepared thread through the loop itself, not through the needle directly.
5. Pull the threader back. Slowly and steadily pull the wire loop back out through the needle’s eye. As it retracts, it will carry the thread through with it.
6. Remove the threader. Once the thread has passed through, gently slide the threader off. Your needle is now threaded and ready to use.
With a little practice, this entire process takes just a few seconds.
Step-by-Step Usage (Automatic Threader)
Automatic or desktop needle threaders work differently from wire loop tools, relying on a mechanical action instead of manual dexterity. While the exact design varies by brand, most follow a similar general process.
1. Prepare your needle and thread. As with any threading method, start with a clean-cut end of thread and make sure your needle is free of bends or burrs that could snag.
2. Position the needle in the clamp. Most automatic threaders have a small slot or clamp where you insert the needle, eye facing in a specific direction (usually indicated on the device). Proper alignment is essential if the needle isn’t seated correctly, the mechanism won’t catch the eye.
3. Lay the thread across the guide. Drape the thread over the designated groove or channel on the device, making sure it’s taut but not pulled too tight.
4. Activate the threading mechanism. Depending on the model, this might mean pressing a lever, pushing a button, or pulling down a small handle. This triggers a tiny hook or wire inside the device to grab the thread and pull it through the needle’s eye automatically.
5. Remove the threaded needle. Once the mechanism completes its motion, carefully lift the needle out of the clamp it should now be fully threaded.
6. Troubleshoot misalignment. If the thread doesn’t catch, the most common cause is incorrect needle positioning. Recheck the eye orientation and try again.
Automatic threaders are especially useful for people who thread needles frequently or struggle with fine motor precision.
Common Mistakes and Troubleshooting
Even with a needle threader in hand, a few common missteps can lead to frustration. Knowing what to watch for makes the process much smoother.
Forcing the wire loop. The most frequent mistake is pushing too hard when the loop doesn’t slide through easily. The wire is thin and flexible by design, but forcing it against resistance can bend it out of shape or snap it entirely, especially if it’s the wrong size for the needle’s eye.
Using too much thread length. A long, dangling thread is more likely to tangle, double back on itself, or slip out of the wire loop before you’ve pulled it through. Trimming to a manageable length especially for beginners makes threading far more reliable.
Mismatched threader size. A wire loop that’s too large for a fine embroidery needle simply won’t fit through the eye, while one that’s too small may not hold thicker thread securely. Matching the threader to both the needle and thread type prevents most snags.
Frayed thread ends. A ragged or angled cut makes it much harder to feed thread through the loop cleanly. Always trim with sharp scissors right before threading.
Snapped or bent wire. If your threader’s wire does bend, gently try to reshape it back into its diamond form though repeated bending will eventually weaken it. At that point, it’s time to replace it rather than keep forcing a damaged tool.
Most threading problems come down to preparation and gentle handling, not the tool itself.
Threading Different Needle Types
Not every needle is created equal, and the threading approach can shift slightly depending on what you’re working with.
Hand-sewing needles. These are the most common and typically have a medium-sized eye, making them compatible with standard wire loop threaders. Most beginners will start here, and the basic step-by-step method works perfectly.
Embroidery needles. These often have a longer, narrower eye designed to accommodate multiple strands of embroidery floss. Because the eye can be delicate, a finer wire loop threader works best a bulkier threader may not fit or could stretch the eye out of shape over time.
Beading needles. Extremely thin and long, beading needles have very small eyes meant for fine thread or beading wire. These require a specialty, ultra-thin threader, as standard tools are usually too thick to pass through.
Sewing machine needles. These have a much smaller, more precisely positioned eye than hand needles. Rather than a handheld wire threader, most sewing machines come with a built-in threading mechanism, or you can use a specialized machine needle threader designed to reach the tighter space.
Yarn and tapestry needles. With large, blunt eyes designed for thick yarn or embroidery wool, these needles need a sturdier, heavy-duty threader with a wider wire loop that won’t collapse under thicker material.
Matching your threader to the specific needle type not only makes threading easier but also helps protect both the needle and the tool from unnecessary wear.
Maintenance and Care
A needle threader is a small, delicate tool, but a little care goes a long way in extending its lifespan and keeping it working reliably.
Store it properly. Tossing a threader loosely into a sewing box or drawer is one of the fastest ways to damage the wire loop. Over time, it can get bent, tangled with other tools, or crushed under heavier items. Keeping it in a small case, pouch, or dedicated compartment protects the delicate wire from unnecessary stress.
Avoid wire fatigue. The wire loop is designed to flex, but repeated bending in the same direction especially from forcing it through needle eyes that are too small weakens the metal over time. Handling it gently and choosing the right size for each needle reduces this wear.
Keep it clean. Lint, thread fuzz, and small debris can build up on the wire loop and frame, especially if you sew often. Wiping the threader with a dry cloth occasionally prevents buildup that could interfere with smooth threading.
Check for damage regularly. Before each use, take a quick look at the wire loop. If it looks bent, kinked, or misshapen, gently try to reshape it but if it no longer holds its form or shows signs of stress fractures, it’s time to retire it.
Replace when needed. Needle threaders are inexpensive and not meant to last forever. Since a worn threader can cause more frustration than it solves, replacing it every so often is a small cost for consistently smooth threading.
Alternative Threading Methods
While a needle threader is often the easiest solution, it’s not the only way to get thread through a needle’s eye. Knowing a few alternatives can be useful in a pinch or as a comparison point.
Self-threading needles. These specially designed needles have a small slot at the top of the eye instead of a fully closed loop. You simply pull the thread down into the slot, and it locks into place. They’re convenient, but the open slot can sometimes let thread slip out during sewing, making them less secure than a traditional needle.
The folded paper or tape trick. A small strip of thin paper or tape can be folded tightly around the end of the thread to stiffen it, making it easier to push through the eye without a threader. It works in emergencies but requires more patience and precision than using a proper tool.
Using tweezers. For very fine needles, some people use tweezers to grip and guide the thread’s tip directly through the eye. This method demands a steady hand and good eyesight, making it less practical for those with dexterity or vision challenges.
Why a threader is still often best. Compared to these alternatives, a needle threader remains faster, more consistent, and easier to use across different needle and thread types. It doesn’t rely on precise hand-eye coordination the way tweezers or the paper trick do, which is why it remains the preferred method for most sewists, regardless of skill level.
Accessibility Angle
For many people, a needle threader isn’t just a convenience, it’s what makes sewing possible at all. Understanding this angle highlights why the tool matters far beyond saving a few seconds.
Visual impairments. For those with low vision, macular degeneration, or age-related eyesight decline, spotting and aligning a needle’s tiny eye can be nearly impossible without assistance. A needle threader removes much of the precision required, since the wider wire loop is far easier to see and guide than the thread itself.
Hand tremors and limited dexterity. Conditions that cause shaky hands or reduced fine motor control, such as arthritis or Parkinson’s, can turn simple threading into a frustrating, sometimes painful task. Automatic threaders in particular are helpful here, since they minimize the precise hand movements needed and let a mechanism do the delicate work instead.
Aging hands. Even without a specific condition, grip strength and coordination naturally decline with age. A threader with an ergonomic, easy-to-hold handle can make sewing accessible again for older adults who may have given up on hand-sewing altogether.
Pairing with other adaptive tools. Needle threaders work well alongside other accessibility-focused sewing tools, such as magnifying lamps, needle books with larger grips, or seam guides with high-contrast markings creating a more complete, accessible sewing setup.
Framed this way, a needle threader isn’t just a small gadget tucked into a sewing kit. For many people, it’s a genuinely enabling tool that keeps a beloved hobby or necessary skill within reach.
Buying Guide
With so many needle threaders available, a few key considerations can help you pick one that actually suits your needs rather than grabbing the first option you see.
Match it to your needle type. If you sew a variety of projects, clothing repairs, embroidery, beading, consider buying a small set with different wire loop sizes rather than a single threader. This ensures you always have the right fit on hand.
Check the frame material. Metal frames tend to be more durable and precise, holding their shape better over repeated use. Plastic frames are lighter and often cheaper, making them a reasonable choice for occasional or beginner use.
Consider your grip needs. If you have arthritis, tremors, or general difficulty with small tools, look for threaders with a wider, textured, or contoured handle. For more significant dexterity challenges, an automatic desktop threader may be worth the extra investment.
Price ranges. Basic wire loop threaders are inexpensive, often sold in packs of 5–10 for just a few dollars, making them easy to stock up on as spares. Automatic or mechanical threaders cost more but offer added ease of use and durability over time.
Where to buy. Craft stores, sewing specialty shops, and online retailers all carry a wide range of options, from basic multipacks to higher-end ergonomic or automatic models. Reading reviews before purchasing an automatic threader is especially useful, since quality varies more in that category.
Conclusion
A needle threader may be one of the smallest tools in a sewing kit, but its impact is anything but minor. What seems like a simple gadget solves a genuinely frustrating problem that has caused countless people to squint, fumble, and occasionally give up on a project altogether. From the basic wire loop threader to more advanced automatic devices, there’s an option suited to nearly every sewing style, skill level, and physical need.
Throughout this guide, we’ve covered the different types of threaders, how they’re built, how to choose the right one, and step-by-step instructions for using both manual and automatic versions. We’ve also looked at common mistakes, how to care for your threader, and how it compares to alternative threading methods. Perhaps most importantly, we’ve highlighted how essential this small tool can be for people with visual impairments, tremors, or reduced dexterity for many, it’s not just convenient, but genuinely enabling.
Whether you’re hemming a pair of pants, working on an embroidery project, or teaching a child to sew for the first time, a good needle threader removes one of the most tedious barriers to getting started. It’s inexpensive, easy to use once you know the steps, and small enough to keep in every sewing kit, purse, or travel bag.
Take a little time to find the threader that fits your needles and your hands best. It’s a small investment that pays off every single time you sit down to sew.