
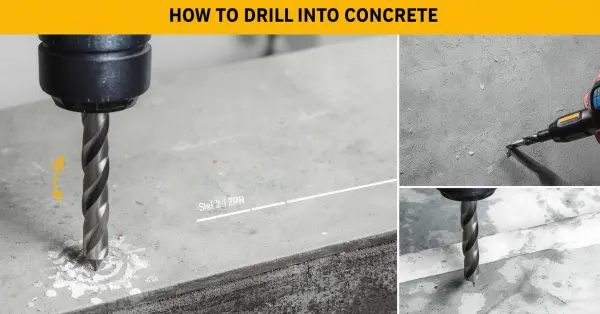
Drilling into concrete can feel like a tough job, but it is easier when you have the right tools and know the correct steps. Whether you want to hang a shelf, mount a TV, install a bracket, or secure an object to a concrete wall or floor, you can make a clean hole with the right approach.
The key is choosing the right drill and concrete drill bit. A hammer drill and carbide-tipped masonry bit are often useful for common concrete projects. You also need to think about hole size, drilling depth, concrete dust, and safety before you start.
In this guide, you will learn how to drill into concrete step by step. We will cover the tools you need, how to choose a drill bit, how to avoid cracks, how to install anchors, and what to do if you hit rebar. By the end, you will know how to approach concrete drilling with more confidence.
Can You Drill Into Concrete?
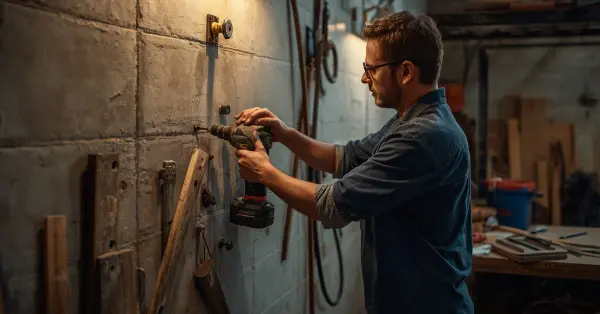
Yes, you can drill into concrete with the right tools and technique. Concrete is much harder than wood or drywall, so a basic drill bit may not be strong enough. For most small home projects, a hammer drill with a carbide-tipped masonry bit is a good choice. The hammer action helps break up the hard material as the bit spins.
The type of concrete also matters. Older, dense concrete can be harder to drill than softer or newer material. Reinforced concrete can be more challenging because it may contain steel rebar inside. If your drill suddenly stops making progress after working normally, you may have reached metal or another hard material.
Before you start drilling, think about what the hole is for. A small hole for a picture or light shelf needs less power than a deep hole for a heavy-duty anchor. The required hole diameter and depth will also depend on the screw or anchor you plan to use.
You should also check the drilling area before making a hole. Electrical wires, plumbing pipes, and other hidden services may run through walls, floors, or slabs. Drilling into one can cause serious damage or injury.
For simple DIY jobs, start with a clear mark, the correct masonry bit, and a suitable drill. Keep the drill straight and apply steady pressure rather than forcing it. Wear eye protection and control concrete dust while working.
If the job involves structural concrete, deep drilling, major reinforcement, or unknown utilities, consider getting professional help. A careful approach will help you create a clean hole while protecting yourself and the concrete around it.
What Tools Do You Need to Drill Into Concrete?
Having the right tools makes concrete drilling much easier. You do not need a huge toolbox for a small home project, but you should choose equipment that matches the size and hardness of the job.
Hammer drill: A hammer drill is a good choice for many small and medium concrete holes. Its hammering action helps break the concrete while the bit rotates.
Masonry drill bit: Use a bit made for masonry or concrete. Carbide-tipped masonry bits are common for everyday drilling. The bit size should match the anchor or screw you plan to install.
Rotary hammer: For hard concrete, deep holes, or larger openings, a rotary hammer can provide more impact power than a standard hammer drill. SDS bits are commonly used with these tools.
Measuring tape: Use a tape measure to find the exact drilling location. Accurate measurements help prevent unnecessary holes.
Marker or pencil: Mark the drilling point clearly before starting. A small mark can help keep the bit in the correct position.
Safety glasses: Concrete drilling creates small chips and dust. Eye protection helps protect your eyes while working.
Dust collection: A shop vacuum or suitable dust-extraction system can help control concrete dust and keep the work area cleaner.
Hearing protection: Hammer drills and rotary hammers can be loud, especially during longer jobs.
You may also need a depth stop, auxiliary handle, concrete anchors, or concrete screws depending on the project. Before drilling, check that your bit is secure and your equipment is in good condition. Using the correct tools not only makes drilling easier but also helps you create a cleaner, more accurate hole.
How to Choose the Right Concrete Drill Bit
Choosing the right drill bit is one of the most important parts of drilling concrete. A good drill can still struggle if the bit is designed for another material. Concrete is hard and abrasive, so use a bit made specifically for masonry or concrete.
Carbide-tipped masonry bits are a common choice for small and medium holes. They have a tough cutting tip that can handle concrete, brick, and other masonry materials. They work well with many hammer drills and are available in different diameters.
For harder concrete or deeper holes, SDS masonry bits can be a better option. These bits are designed for rotary hammers and provide a secure connection while allowing the tool to deliver strong impact force.
For very large openings, diamond core bits may be used. They are designed to create larger, cleaner holes and are often used for plumbing, electrical, and other specialized work. These tools require more care and are usually unnecessary for simple household projects.
The diameter of the bit is also important. If you are installing a concrete anchor, check the anchor’s instructions for the required hole size. Do not simply choose a bit based on the screw’s diameter.
You should also consider the length of the bit. The bit needs to reach the required drilling depth without being too short. Avoid using a damaged, bent, or badly worn bit because it can make drilling slower and less accurate.
Finally, inspect the bit before starting. If the carbide tip is damaged or the bit looks heavily worn, replace it. Using the correct bit helps reduce effort, improves hole accuracy, and makes the entire concrete drilling process smoother.
How to Prepare Concrete Before Drilling
Good preparation can make concrete drilling safer, cleaner, and more accurate. Before turning on your drill, take a few minutes to plan the hole and prepare the work area.
First, decide exactly where you need the hole. Measure the location carefully and mark the drilling point with a pencil or marker. Check the measurements again before drilling. A wrong hole can be difficult to repair, especially when mounting shelves, brackets, or other items.
Next, determine the required hole diameter and depth. Check the instructions for your concrete screw, anchor, or other fastener. The hole should match the recommended size instead of being based on guesswork.
You should also check what may be hidden behind or inside the concrete. Walls and floors can contain electrical wiring, plumbing, heating components, or other utilities. Never drill blindly when you do not know what is behind the surface. If you are unsure about the location of hidden services, stop and get appropriate professional guidance.
Clean the area around the drilling point and remove anything that could get in your way. Make sure the surface and your footing are stable. If you are drilling overhead or at an awkward height, use a safe working position rather than stretching or overreaching.
Finally, prepare your safety equipment. Wear safety glasses to protect your eyes from concrete chips. Use suitable respiratory protection and dust control because drilling can create fine concrete dust. Hearing protection is also useful when working with loud hammer drills or rotary hammers.
Once the location, depth, tools, and safety measures are ready, you can begin drilling with greater control and fewer surprises.
How Deep Should You Drill Into Concrete?
The correct drilling depth depends on what you plan to install. A small hole for a light-duty anchor may not need much depth, while a heavy-duty concrete anchor can require a deeper hole. The best approach is to follow the installation instructions for your specific screw, anchor, or fastener.
Start by checking the required embedment depth. This is the amount of the fastener that needs to sit inside the concrete to provide proper holding strength. The manufacturer’s instructions may also specify a particular hole depth that is slightly deeper than the anchor’s required embedment.
A depth stop on your drill can make this easier. Set it before drilling so you do not accidentally go too deep. If your drill does not have one, you can place a small piece of tape around the bit at the desired depth. This gives you a simple visual stopping point.
Do not guess the depth based only on the screw length. Different anchors have different installation requirements. Some need extra space at the bottom of the hole for dust and debris, while others have specific minimum and maximum depths.
You should also consider the thickness of the concrete. Avoid drilling deeper than necessary, especially when working near the opposite side of a slab or wall.
If you accidentally drill a hole that is too shallow, clean it and continue drilling to the required depth. If it is too deep, the correct solution depends on the fastener and application. For important or load-bearing installations, follow the manufacturer’s guidance rather than improvising.
Taking a moment to measure the required depth before drilling can save time and help create a secure, properly fitted installation.
How to Drill Into Concrete Without Cracking It
Concrete is strong, but it can still chip or crack when drilled incorrectly. The good news is that careful preparation and the right technique can greatly reduce the risk of damage.
Start by using the correct masonry drill bit. A worn, damaged, or unsuitable bit can make you apply too much force, increasing the chance of chipping. Make sure the bit diameter matches the anchor or screw you plan to install.
Keep the drill straight and steady while working. A tilted bit can enlarge the hole or put uneven pressure on the concrete. Start drilling slowly to create a small opening before increasing your pace. This also helps prevent the bit from moving away from your marked point.
Avoid using excessive force. Let the hammer drill or rotary hammer do most of the work. Pushing too hard can damage the bit, overwork the tool, and create unnecessary stress around the hole.
Location also matters. Try not to drill too close to an edge, corner, or existing crack. Concrete near these areas has less material surrounding the hole and may be more likely to chip or break.
The size and depth of the hole should also match the fastener’s requirements. An oversized hole can weaken the connection, while an incorrectly placed hole may damage the surrounding concrete.
If you notice an existing crack near your drilling location, stop and assess the situation before continuing. For structural concrete, foundations, or critical load-bearing work, professional advice may be appropriate.
With the right bit, controlled pressure, proper alignment, and careful placement, you can make a clean hole while reducing the chance of cracks and surface damage.
How to Drill Into a Concrete Floor
Drilling into a concrete floor is similar to drilling into a wall, but the working position and hidden hazards can be different. You may need to drill a floor when installing equipment, securing a bracket, mounting a post, or installing an anchor.
Start by measuring and marking the exact drilling location. If you are installing several anchors, use the mounting plate or template to mark each point. Double-check the measurements before drilling because an incorrectly placed hole can be difficult to repair.
Before you start, consider what may be under the concrete. Floors and slabs can contain pipes, electrical systems, heating elements, or other embedded components. If you do not know what is beneath the drilling area, investigate it before making a hole. Extra care is especially important when working on structural slabs.
Choose a drill and bit that match the job. A hammer drill with a carbide-tipped masonry bit can handle many small holes. For deeper holes, dense concrete, or larger openings, a rotary hammer may be more suitable.
Wear safety glasses and suitable respiratory protection. Concrete dust can spread quickly when drilling downward, so use a vacuum or other appropriate dust-control method. Keep the area clear so you have stable footing while operating the tool.
Position the drill straight down and hold it firmly. Start slowly to establish the hole, then apply steady pressure. Avoid forcing the drill. Periodically remove dust if needed, especially when drilling deeper holes.
Once you reach the required depth, stop and clean the hole thoroughly. Remove loose dust and debris before inserting the anchor or fastener.
For structural floors, post installations, or large penetrations, use the appropriate professional equipment and guidance. Careful planning helps you drill accurately without unnecessarily damaging the concrete slab.
How to Drill Into Reinforced Concrete
Reinforced concrete contains steel bars or mesh inside the concrete to improve its strength. This makes drilling more challenging than working with ordinary concrete. You may begin drilling normally and then suddenly feel the bit stop making progress. This can happen when the bit reaches reinforcement.
If you suspect you have hit rebar, do not simply push harder on the drill. Excessive pressure can damage the bit, overload the tool, or make the drilling process harder to control. Stop and assess the situation first.
The location of the reinforcement matters. If the hole is for a non-critical mounting job, you may be able to choose another suitable location. However, you should not randomly cut or damage reinforcement in structural concrete because it can affect the concrete member’s intended strength.
For occasional DIY work, a hammer drill may handle some reinforced concrete, but a rotary hammer with an appropriate bit can provide more impact power for difficult drilling. Specialized equipment may be needed when drilling through substantial reinforcement or creating large openings.
Pay attention to changes while drilling. A sudden change in resistance, unusual vibration, or a metallic sound may indicate that you have reached steel. Stop rather than forcing the tool forward.
You should also be especially careful with foundations, columns, beams, structural slabs, and other load-bearing components. If you do not know where the reinforcement is located, professional assessment may be the safest option.
Before drilling reinforced concrete, confirm the hole location, depth, and purpose. Use the correct equipment and avoid unnecessary damage to the structure.
When reinforcement is encountered, the goal should not simply be to get through it. The priority is to complete the work without compromising the concrete’s structural function or creating an unsafe situation.
How to Drill Through Concrete
Drilling through concrete means creating an opening that passes completely through the material rather than stopping at a specific depth. This can be useful for running cables, pipes, bolts, or other hardware. Because you will break through the opposite side, extra care is needed to avoid damage.
Start by measuring the exact location and checking both sides of the concrete if possible. Make sure there are no electrical wires, pipes, or other hidden services in the drilling path. If you cannot safely determine what is inside the concrete, do not drill blindly.
Choose a concrete-rated masonry bit that is long enough for the required depth. For larger or deeper holes, a rotary hammer with an appropriate SDS bit may provide better performance than a standard hammer drill.
Mark the drilling point clearly and position the tool as straight as possible. Begin slowly to establish the hole. Once the bit is stable, continue with steady pressure. Avoid forcing the drill because excessive pressure can damage the bit or make the tool difficult to control.
When the bit approaches the opposite side, slow down and use lighter pressure. The final breakthrough can cause concrete to chip or break away. If you can safely access the other side, placing a suitable protective surface there may help catch debris.
For larger holes, specialized core-drilling equipment may provide a cleaner result than repeatedly enlarging a small opening.
After drilling, remove loose debris and inspect the hole. Check that it is straight, large enough, and deep enough for the intended application.
Always wear appropriate eye and respiratory protection and control concrete dust during the job. If you are drilling through a structural wall, beam, foundation, or reinforced slab, professional guidance may be necessary before proceeding.
How to Drill Concrete for Anchors
Concrete anchors provide a strong way to attach shelves, brackets, fixtures, and other items to concrete. However, an anchor only works properly when the hole is the correct size, depth, and condition.
Start by choosing an anchor designed for your concrete application. Different anchors have different installation requirements, so check the manufacturer’s instructions before drilling. The instructions should tell you the required hole diameter, depth, and installation method.
Once you know the specifications, select a suitable masonry drill bit. The bit diameter should match the anchor’s requirements rather than simply matching the screw diameter. Mark the drilling point and measure the required depth.
Put on appropriate safety equipment and position your drill straight against the concrete. Start slowly to establish the hole, then continue with steady pressure. Avoid forcing the drill or moving it from side to side because this can create an oversized hole.
After reaching the required depth, remove the bit and clean the hole. Concrete dust and loose debris can prevent an anchor from seating correctly. A vacuum is a useful way to remove loose material without spreading unnecessary dust around the work area.
Insert the anchor according to its instructions. Some anchors are tapped into place, while others are inserted before the fastener is tightened. Do not use excessive force during installation.
Once the anchor is installed, attach your bracket, shelf, or other hardware and tighten the fastener as recommended. Avoid over-tightening because excessive force can damage the anchor or surrounding concrete.
For heavy loads, use an anchor specifically rated for the application. Consider the weight, direction of the load, concrete condition, and required embedment depth.
A properly drilled and cleaned hole is the foundation of a secure concrete anchor. Taking extra time during measurement and installation can help prevent loose fasteners and damaged concrete.
How to Drill Into Concrete With a Regular Drill
If you do not have a hammer drill, you may still be able to drill a small hole into concrete with a regular drill. However, this method works best for lighter tasks and softer concrete. Hard or dense concrete can make the process slow and may place extra strain on the drill.
Start by choosing a carbide-tipped masonry bit designed for concrete. Do not use a standard wood or metal bit. Check the required hole diameter and select a bit that matches the instructions for your anchor or fastener.
Mark the exact drilling point before starting. Hold the regular drill firmly and keep the bit straight against the surface. Begin at a low speed to help prevent the bit from slipping. Once the bit creates a small starting point, you can continue drilling at a controlled speed.
Apply steady pressure, but do not push as hard as possible. Without hammer action, the bit needs time to remove the concrete. Pull the bit out occasionally to clear dust from the hole. This can help maintain progress, especially when drilling deeper.
Watch the drill and bit while working. If the drill becomes very hot, produces little progress, or starts to struggle heavily, stop and allow it to cool. A dull or damaged bit can also make the job much harder.
For several holes, thick concrete, deep drilling, or larger openings, switching to a hammer drill or rotary hammer is usually more practical. These tools are designed to deliver impact force that helps break concrete more efficiently.
A regular drill can be useful when you only need a small hole and have no better option. Still, use the correct masonry bit, maintain good control, and avoid forcing the tool. For demanding concrete work, the right hammering tool will usually save time and effort.
How to Drill Concrete Without a Hammer Drill
You can drill a small hole into concrete without a hammer drill, but the process may take more time and effort. A regular drill relies only on the rotation of the bit, while a hammer drill adds impact to help break the concrete.
Start with a carbide-tipped masonry bit made for concrete. Select the correct diameter based on the anchor, screw, or fastener you plan to use. A standard wood or metal bit is not a suitable replacement because it is not designed for abrasive masonry.
Mark the drilling location clearly and make sure the surface is safe to drill. Check for hidden electrical wiring, pipes, or other services before starting. Wear safety glasses and suitable respiratory protection, and use dust control where possible.
Place the masonry bit directly on the mark. Hold the drill firmly and keep it perpendicular to the concrete. Begin slowly. This helps the bit create a small starting point instead of sliding across the surface.
Once the hole has started, continue with steady pressure. Do not force the drill. Because there is no hammer action, progress may be slower. Pull the bit out occasionally to clear accumulated dust and help the bit continue cutting.
If the drill becomes very hot, stop and let it cool. A dull bit can also make drilling extremely difficult, so inspect the bit if progress suddenly decreases.
This method is most practical for small, shallow holes in relatively manageable concrete. It is not ideal for thick concrete, large holes, or multiple deep holes.
If the regular drill struggles continuously, do not keep forcing it. A hammer drill or rotary hammer will be much better suited to demanding concrete work and can reduce stress on both the tool and the operator.
How to Drill Concrete Faster
Concrete drilling does not have to be painfully slow. The biggest factor is using the right tool and bit for the job. Trying to make a difficult hole with weak equipment can waste time and place unnecessary stress on the drill.
Start with a sharp, concrete-rated masonry bit. A worn bit removes material less efficiently and can make you push harder. Check the bit before every project and replace it if the tip is damaged or badly worn.
Choose the right drill for the job. A hammer drill is usually suitable for small and medium holes, while a rotary hammer can make deeper or larger holes much more efficiently. Using a powerful tool for a demanding job can save significant time.
Correct bit size also matters. Do not use an unnecessarily large bit for a small fastener. Match the diameter to the anchor or screw specifications.
Your drilling technique can make a difference too. Keep the drill straight and apply steady, controlled pressure. Avoid pushing with maximum force. The hammer action and cutting tip should do most of the work.
Concrete dust can slow drilling by building up inside a deep hole. Pull the bit out occasionally to clear loose material. Proper dust extraction can also keep the hole cleaner and make the work area easier to manage.
Avoid overheating the drill or bit. If the tool becomes unusually hot, stop and allow it to cool. Continuous forcing can reduce tool life and damage the bit.
Finally, prepare everything before you start. Have the correct bit, anchor, measuring tools, and safety equipment ready. Good preparation prevents unnecessary stops.
The fastest approach is not simply drilling harder. It is using the right tool, correct bit, suitable pressure, and proper technique for the concrete and hole you need.
How to Keep Concrete Dust Under Control
Concrete drilling creates fine dust that can spread around your workspace and settle on nearby surfaces. Good dust control helps keep the area cleaner and reduces the amount of airborne dust you breathe.
Before drilling, prepare a vacuum or suitable dust-extraction system. If your drill or attachment supports dust collection, use it according to the manufacturer’s instructions. This can capture dust close to the drilling point instead of allowing it to spread through the room.
Wear appropriate personal protective equipment as well. Safety glasses help protect your eyes from chips and particles, while suitable respiratory protection can reduce inhalation of fine dust. Hearing protection is also useful when working with loud hammer drills or rotary hammers.
Keep the work area clear before you begin. Move furniture, tools, and other items away from the drilling location. Cover nearby objects when necessary, especially when working indoors.
While drilling, avoid unnecessary movements that can spread dust. Drill with controlled pressure and remove the bit from deeper holes when needed to clear accumulated material. Do not use compressed air to casually blow concrete dust around the room because this can put more particles into the air.
After drilling, use a suitable vacuum to collect loose dust and debris. Clean the area carefully rather than sweeping fine dust aggressively, which can make it airborne again.
The hole itself should also be cleaned before installing an anchor or fastener. Loose concrete dust can interfere with proper installation, depending on the type of fastener being used.
For larger jobs, professional dust-control systems may be appropriate. Wet drilling can also be used for certain specialized applications, but it is not suitable for every tool, location, or electrical setup.
Good dust control should be part of the drilling plan from the beginning, not something you think about only after the concrete work is finished.
How to Fix a Hole That Is Too Large
A concrete hole that is too large can cause problems when you are trying to install an anchor or screw. The fastener may feel loose, fail to grip properly, or move when weight is placed on it. Before fixing the hole, identify why it became oversized and what type of fastener you need to install.
If the hole is only slightly larger than required, check the manufacturer’s instructions for the anchor. Some anchor systems may tolerate a small variation, while others require a precise hole diameter. Do not assume that adding extra material will make an unsuitable hole safe.
For a significantly oversized hole, one option may be to use a larger anchor designed for the application. The new anchor must be suitable for the concrete and capable of supporting the expected load. This is especially important for shelves, brackets, equipment, or anything that could cause injury if it falls.
Another approach for some non-critical applications is repairing the hole with an appropriate concrete repair material and creating a new hole after it has properly cured. The repair method depends on the size, location, and purpose of the hole.
Do not simply fill a large hole with random material and immediately install a heavy-duty fastener. The repair needs to provide a suitable base for the intended fastener.
If the hole is located near an edge, crack, or structural component, take extra care. Creating another hole too close to the first one can weaken the surrounding concrete.
The best solution depends on the application. For critical, structural, or heavy-load installations, follow the anchor manufacturer’s requirements or consult a qualified professional.
To prevent oversized holes in the future, use the correct bit diameter, keep the drill straight, avoid excessive sideways movement, and replace worn bits. Measuring twice before drilling can also save considerable time.
How to Fix a Hole That Is Too Deep
Drilling deeper than necessary is a common mistake, especially when you are working without a depth stop. Whether the extra depth is a problem depends on the type of anchor, screw, and concrete installation you are using.
First, check the manufacturer’s instructions for your fastener. Some anchors can still work when the hole is deeper than required, as long as the hole diameter and embedment are correct. Other systems may require a specific hole depth for proper installation.
If the hole is only slightly deeper, you may not need to repair it. Clean the hole thoroughly and confirm that the anchor can still achieve the required embedment. Avoid adding random materials to the bottom of the hole to reduce its depth unless the fastener manufacturer specifically allows that method.
For a hole that is significantly deeper than needed, the safest solution may be to choose a suitable fastener that works with the existing hole. This should only be done when the new fastener is properly rated for the application.
If the hole is in the wrong location or creates a concern near the opposite side of a wall or slab, do not simply drill another hole nearby. Multiple unnecessary holes can weaken the surrounding material, especially near edges or structural components.
For structural concrete, foundations, beams, columns, or heavy-load installations, get appropriate professional advice before modifying the hole.
The easiest way to prevent over-drilling is to determine the required depth before starting. Use your drill’s depth stop when available. If your drill does not have one, mark the required depth on the bit with removable tape as a visual guide.
Remember that deeper is not automatically better. The goal is to create a hole that matches the fastener’s specifications while removing as little concrete as necessary. Careful measurement and controlled drilling make this much easier.
How to Clean a Concrete Hole After Drilling
Cleaning the hole after drilling is an important step, especially when you are installing a concrete anchor or concrete screw. Drilling creates fine dust and loose particles inside the hole. If this debris stays inside, the fastener may not sit correctly or grip the concrete as intended.
Start by removing the loose dust from the hole. A vacuum with a narrow nozzle is a simple option for DIY projects. Place the nozzle close to the opening and remove as much dust as possible. You can also use a suitable hole-cleaning brush to loosen particles stuck to the sides.
For deeper holes, cleaning may require more than one pass. Brush the inside, vacuum the debris, and repeat until the hole is reasonably clear. Always follow the cleaning instructions provided with your specific anchor, because some fastening systems have precise cleaning requirements.
Avoid blowing concrete dust into the air with your mouth or compressed air. Fine concrete dust can irritate your eyes and lungs. Wear safety glasses and appropriate respiratory protection when working in dusty conditions.
After cleaning, inspect the hole. Check that it has the correct diameter and depth and that there are no large chunks of concrete blocking the bottom. The hole should be free enough for the anchor or screw to reach its intended position.
If you are using an adhesive anchor, proper hole cleaning becomes even more important because dust can interfere with bonding. Follow the adhesive manufacturer’s instructions carefully for brushing, blowing, and vacuuming.
Once the hole is clean and correctly sized, you can install the fastener according to its instructions. Taking an extra minute to clean the hole can help prevent loose anchors, poor fastening, and unnecessary rework.
Concrete Drilling Safety Tips
Drilling into concrete can create dust, noise, flying chips, and strong vibration. Using the right safety steps helps protect your eyes, ears, lungs, and hands while making the job easier.
Always wear safety glasses or goggles before starting. Small pieces of concrete can break away from the hole and travel quickly. Hearing protection is also a good idea because hammer drills and rotary hammers can be very loud.
Concrete dust deserves special attention. Fine silica-containing dust can be harmful when inhaled. Use a suitable dust-extraction system, such as a vacuum connected to the drill when possible. Wear appropriate respiratory protection when dust cannot be adequately controlled, and keep other people away from the immediate work area.
Before drilling, check the area for hidden electrical wires, plumbing, pipes, and other services. Do not drill into a location unless you are confident it is safe. Be especially careful around walls, floors, and ceilings where utilities may be hidden.
Hold the drill firmly with both hands when the tool design allows it. Keep your body balanced and maintain a stable position. Start drilling slowly so the bit does not wander from the marked point.
Do not force the drill if it suddenly becomes difficult to advance. Excessive pressure can damage the bit, overheat the tool, or create an unsafe reaction. Unexpected resistance may also indicate rebar or another obstruction.
Keep loose clothing, hair, and hands away from moving parts. Unplug or disconnect the drill before changing bits or making adjustments.
Finally, clean the work area after drilling. Remove concrete dust and debris carefully rather than blowing it into the air.
If the job involves structural concrete, major reinforcement, or an uncertain utility location, stop and get professional advice before continuing.
Best Practices for Different Concrete Drilling Projects
The best way to drill concrete depends on the type of project, the size of the hole, and the load the finished installation must support. Choosing the right method before you start can save time and prevent damage.
For small wall anchors, use a hammer drill with a suitable carbide-tipped masonry bit. Mark the location, drill to the required depth, clean the hole, and install the anchor according to its instructions.
For mounting shelves, cabinets, or brackets, pay attention to the expected load. Choose anchors that are rated for the weight and concrete type. Do not rely on a small anchor for a heavy installation.
When drilling a concrete floor, check what may be underneath before starting. Plumbing, electrical services, or other components could be hidden below the surface. Keep the drill straight and control dust throughout the job.
For large holes needed for pipes, vents, or cables, a rotary hammer or diamond core drill may be more appropriate than a standard drill. Large openings require more powerful equipment and careful positioning.
When drilling near an edge or corner, use extra caution. Concrete can chip or crack when the hole is too close to an unsupported edge. Follow the spacing recommendations for your chosen anchor or fastening system.
For reinforced concrete, stop if you encounter unexpected resistance that could indicate rebar. Do not simply force the drill through it, particularly when working on structural elements.
If you need several holes, plan their locations first. Maintain proper spacing and avoid creating unnecessary holes close together.
For every project, match the drill, bit, hole diameter, depth, and fastener to the job. Follow manufacturer instructions rather than guessing.
When the project involves structural concrete, large openings, major reinforcement, or uncertain utilities, professional guidance is the safer option. Good planning is often the most important part of successful concrete drilling.
Frequently Asked Questions About Drilling Into Concrete
Can you drill into concrete with a normal drill?
Yes, a normal drill can sometimes make small holes in concrete when paired with a carbide-tipped masonry bit. However, hard concrete can be slow to drill without hammer action. For regular or deeper holes, a hammer drill or rotary hammer is usually more effective.
What is the best drill for concrete?
A hammer drill is a good choice for many household concrete projects. For larger, deeper, or more demanding holes, a rotary hammer can provide more power. The best tool depends on the hole size, concrete hardness, and project requirements.
What drill bit should I use for concrete?
Use a masonry bit designed for concrete, preferably one with a carbide tip. For specialized large holes, a diamond core bit may be appropriate. Always choose a bit that matches your drill and the required hole diameter.
Why won’t my drill go through concrete?
The concrete may be very hard, the bit may be worn, or the drill may not provide enough impact power. You may also have encountered reinforcement such as rebar. Stop rather than forcing the tool if resistance suddenly increases.
How deep should I drill into concrete?
The correct depth depends on the anchor or fastener being installed. Follow the manufacturer’s specifications for both hole depth and diameter. A depth stop or piece of tape on the bit can help prevent drilling too deeply.
How do I keep concrete dust under control?
Use a vacuum or suitable dust-extraction system while drilling when possible. Wear eye protection and appropriate respiratory protection for dusty work. Avoid blowing concrete dust into the air.
Can drilling concrete cause cracks?
It can, especially when drilling too close to edges, using excessive force, or working near existing damage. Use the correct bit, start slowly, keep the drill straight, and follow proper spacing requirements.
Should I hire a professional?
Professional help is recommended for structural concrete, large openings, heavily reinforced areas, or locations where hidden utilities may be present.
Final Checklist Before You Drill Into Concrete
Before you start drilling into concrete, take a few minutes to check your tools, drilling location, and safety equipment. Good preparation can prevent damaged concrete, oversized holes, and unnecessary repairs.
Check the drilling location. Make sure you understand what is behind, below, or around the concrete. Look for possible electrical wiring, plumbing, pipes, and other hidden services. Avoid drilling if you are unsure about what may be inside the structure.
Choose the right drill. A hammer drill works well for many small and medium concrete holes. A rotary hammer or specialized core drill may be needed for larger or deeper openings.
Choose the correct bit. Use a masonry bit designed for concrete, with the correct diameter for your anchor, screw, or other fastener. Make sure the bit is sharp and compatible with your drill.
Measure the hole. Confirm the required diameter and depth before drilling. Mark the location clearly and use a depth stop or tape on the bit to avoid drilling too deeply.
Prepare your safety gear. Wear safety glasses, hearing protection, and suitable respiratory protection when dust cannot be adequately controlled. Use dust extraction whenever possible.
Secure your position. Stand comfortably and keep the drill straight against the concrete. Make sure the work area is clear of unnecessary objects and people.
Start slowly. Begin at a controlled speed so the bit stays on your mark. Apply steady pressure without forcing the tool.
Clean the hole. Remove drilling dust and loose debris before installing an anchor or screw.
Finally, stop if you encounter unusual resistance, unexpected cracking, or signs of hidden reinforcement or utilities. For structural or high-risk work, get professional advice.
A quick checklist before drilling can make the entire project safer, cleaner, and more successful.