
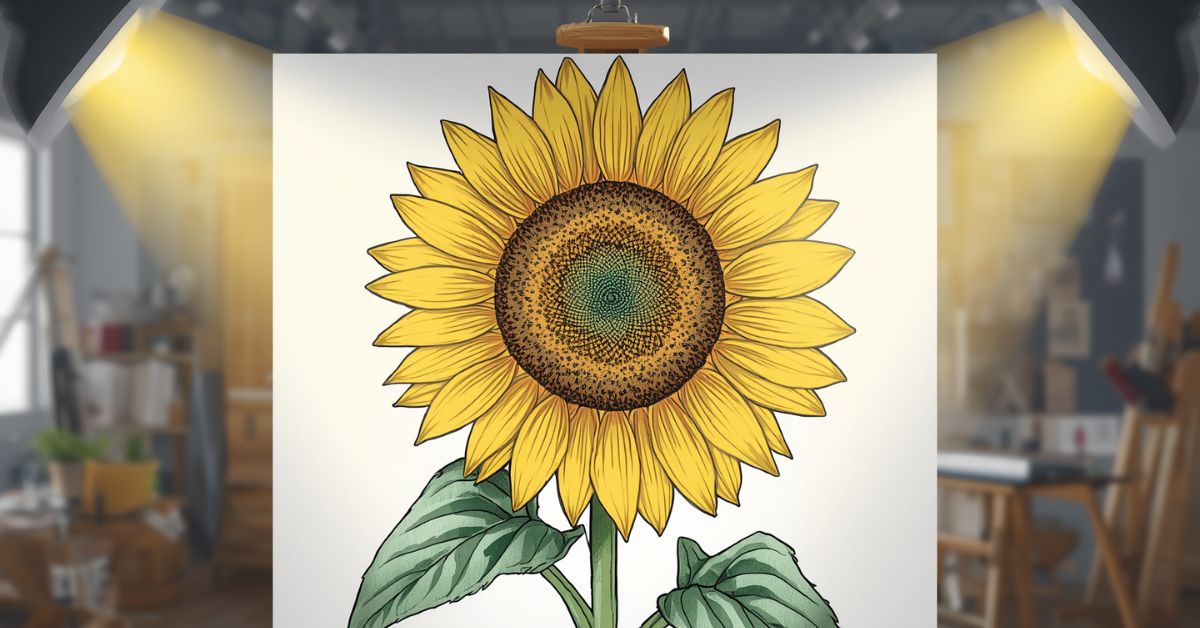
There’s a reason sunflowers are one of the most popular flowers to draw, even for people who don’t consider themselves particularly artistic. Their bold, radiating petals and textured center make them instantly recognizable, forgiving to sketch, and genuinely satisfying to bring to life on paper.
Whether you’re picking up a pencil for the first time or just want a quick refresher on getting proportions right, this guide breaks the process down into simple, manageable steps. No advanced technique required just a handful of basic shapes layered together thoughtfully.
By the end of this tutorial, you’ll know how to draw a sunflower from scratch, understand the basic anatomy that makes it look realistic, and have a few tips for adding shading, color, and your own personal style. Let’s start with the basics before jumping into the step-by-step instructions.
Understanding Sunflower Anatomy
Before picking up a pencil, it helps to understand what actually makes a sunflower look like a sunflower. A quick look at its real structure makes the drawing process far more intuitive, since you’ll know why each shape and detail belongs where it does.
Every sunflower is made up of four basic parts: the seed head (the large, round center), the petals (the bright yellow ray florets radiating outward), the stem (typically thick and sturdy to support the heavy flower head), and the leaves (broad, textured, and slightly jagged along the edges).
Understanding real anatomy directly improves your drawing. For example, knowing that sunflower stems are notably thick not thin like a daisy’s helps you avoid one of the most common beginner mistakes: drawing a stem too delicate to realistically support the flower head.
The center of a sunflower is particularly interesting from a drawing perspective. In real life, the seeds spiral outward in a mathematical pattern related to the Fibonacci sequence, creating those distinctive curved rows you see in photos. You don’t need to recreate this pattern with scientific precision, but referencing it short, curved lines radiating and spiraling from the center makes your sunflower’s texture look far more convincing than random dots or scribbles.
Petals, meanwhile, aren’t perfectly uniform in real sunflowers. They vary slightly in length, width, and angle, which is a detail worth keeping in mind once you get to the drawing steps later in this guide.
Materials & Tools Needed
You don’t need a big art supply haul to draw a great sunflower in fact, most people already have everything necessary sitting in a drawer at home.
Basic supplies are all you really need to get started: a regular pencil (an HB works perfectly fine for sketching), an eraser, and a sheet of paper. These three items alone are enough to complete every step in this tutorial, from the initial guide shapes to the final details.
Optional tools can take your drawing further once you’re comfortable with the basic shapes. A fine-liner or pen is useful for outlining your final pencil lines, giving the drawing crisp, clean edges once you’re happy with the sketch underneath. For color, colored pencils offer the most control and are especially beginner-friendly, while markers provide bolder, more saturated color with less blending effort. Watercolor paints are a great option if you want a softer, more artistic finish, though they require slightly more practice to control.
Paper type matters more than most beginners expect. Regular sketch paper works fine for pencil practice, but if you plan to add color, mixed media paper holds up better against markers or light watercolor washes without bleeding through or warping. If you’re drawing digitally, apps like Procreate offer a virtually unlimited “canvas” with the added benefit of an undo button a nice safety net while you’re still getting comfortable with proportions.
Ultimately, the tools matter far less than practice. A simple pencil sketch, done thoughtfully, will always look better than a rushed drawing made with expensive materials.
Basic Shapes & Foundations
Every good sunflower drawing starts with simple guide shapes not detailed lines. This foundational step is often skipped by beginners eager to jump straight to petals and detail, but it’s actually what makes the rest of the drawing come together smoothly.
Start by thinking of the sunflower as a combination of basic geometric shapes: a circle for the center, a larger circle as a guide for petal placement, elongated ovals for the petals themselves, and simple curved lines for the stem. Breaking the flower down this way makes it far less intimidating, especially for beginners who might feel overwhelmed trying to draw a “whole flower” all at once.
Light sketching matters more than it might seem. Draw your initial guide shapes with very light pencil pressure. These lines are temporary they exist purely to help you place petals evenly and keep proportions balanced, and you’ll erase most of them once the final details are in place. Pressing too hard at this stage makes later erasing messy and can leave visible indentations on your paper.
Proportion is the other key foundation. A common mistake is making the center circle too small relative to the overall flower, which throws off the entire drawing’s balance. As a general rule, the center should take up roughly one-third to one-half of the total flower head’s diameter. Similarly, the stem should be noticeably thick sunflowers have sturdy, substantial stems, not thin, delicate ones like many other flowers.
Getting these foundational shapes and proportions right sets you up for a much smoother step-by-step process next.
Step-by-Step Drawing Instructions
With your foundational shapes and proportions in mind, here’s the full process for bringing your sunflower to life.
Step 1–2: Begin by lightly sketching a circle for the seed head, then fill it with small overlapping curved lines or a gentle spiral pattern to represent the seed texture.
Step 3: Draw a second, larger guide circle around the center. This marks where your petals will begin, and adding small evenly spaced dashes around it helps plan petal placement before committing to final lines.
Step 4: From the guide circle, draw elongated oval or teardrop-shaped petals pointing outward in all directions. Vary the angle and length slightly petal to petal real sunflower petals are never perfectly uniform.
Step 5: For a fuller, more realistic look, add a second layer of slightly smaller petals tucked between the first layer, closer to the center.
Step 6: Draw the stem using two slightly curved parallel lines extending downward from the base of the flower head. Keep it noticeably thick.
🙌Step 7–8: Add a few large, heart-shaped or oval leaves along the stem with jagged edges, then add central veins with smaller diagonal lines branching off for realism.
👍Step 9: Once you’re happy with the overall shape, gently erase any leftover guideline circles or marks.
Step 10: Finish by outlining your final pencil lines with a fine-liner if desired, then add color yellow or golden-orange petals, a brown or dark orange center, and green for the stem and leaves.
Different Styles of Sunflower Drawing
Once you’re comfortable with the basic step-by-step process, it’s worth exploring different stylistic approaches the same core structure can be adapted into several distinct looks depending on your goals.
Realistic/botanical style focuses on accurate proportions, detailed seed texture, and naturalistic petal variation, often paired with shading to show light and shadow. This style takes the most practice but produces the most striking, lifelike results ideal for anyone interested in botanical illustration or nature journaling.
Simple cartoon/kawaii style simplifies the sunflower into rounder, more playful shapes often with fewer, chunkier petals and sometimes a cute face added to the center. This style is especially popular for stickers, greeting cards, or casual doodling, and is very forgiving for beginners since precision matters far less.
Line art/minimalist style strips the drawing down to clean, continuous outlines with little to no shading or texture. This style works particularly well for tattoo designs, single-line art, or modern wall art, relying on confident, smooth lines rather than intricate detail.
Watercolor-friendly sketch style uses looser, lighter pencil guidelines specifically designed to be filled in with paint rather than colored pencil or marker. The pencil sketch here is intentionally simple, leaving room for the watercolor itself to create texture and depth through blending and layering.
Doodle style for journaling is the most casual approach: quick, loose sunflowers often drawn from memory rather than careful observation, perfect for bullet journals, planner decoration, or margin doodles where speed matters more than precision.
Coloring & Shading Techniques
Color and shading are what take a sunflower drawing from a flat sketch to something that feels dimensional and alive.
Color palette options go beyond the obvious yellow-and-brown combination. The classic palette uses golden yellow or warm yellow for petals with a rich brown or dark orange center, but you can experiment with a sunset-inspired palette of orange, deep red, and burnt sienna petals for a more dramatic, stylized look. A monochrome palette, using varying shades of a single color, works well for a more artistic or minimalist interpretation.
Basic shading starts with identifying a light source, imagine where light is hitting your sunflower from, then keep that side of each petal lighter while adding gentle shadow to the opposite side. The same principle applies to the center: lighter tones near where light hits, darker tones curving into the shadowed areas of the seed pattern.
Blending techniques vary by medium. With colored pencils, layering light strokes of multiple colors and blending with a blending stump or even a tissue creates smooth gradients. With markers, working while the ink is still slightly wet allows colors to blend at the edges before drying.
Adding highlights brings a final touch of realism or polish. A small white gel pen or the tip of an eraser can lift tiny highlight marks along petal edges or the seed head, mimicking the way light catches on a glossy or dewy surface a small detail that makes a noticeable difference in the final result.
Drawing a Sunflower From Different Angles
Once you’re comfortable with the standard front-facing sunflower, learning to draw it from other angles adds variety and makes your artwork feel more dynamic.
Front-facing view is the most common and beginner-friendly angle, and the one covered in the step-by-step instructions earlier in this guide. Because you’re looking directly at the flower head, all petals are visible and evenly spaced, making proportions easier to manage.
Side profile view is more challenging but adds a lot of visual interest. From this angle, the flower head appears as more of an oval or flattened circle rather than a perfect circle, and only a portion of the petals are visible the rest curve behind the flower head, out of view. The stem also becomes more prominent in this composition, often curving slightly to support the weight of the head.
Three-quarter angle view sits between the front-facing and side profile, showing most of the flower head while still conveying a sense of depth and dimension. This angle is a popular choice for more advanced or realistic sunflower illustrations, since it avoids the flatness of a straight-on view.
Drooping/downward-facing sunflower reflects how mature sunflowers often appear in real life, especially later in the season. This angle involves curving the stem so the flower head tilts downward, with petals foreshortened at the top and more visible toward the bottom. It’s a great option for a more naturalistic, less “textbook” looking drawing.
Practicing these angles alongside the basic front view helps build a more well-rounded understanding of sunflower structure overall.
Drawing a Field or Bouquet of Sunflowers
Once you’ve mastered a single sunflower, drawing multiples together opens up more creative composition options whether you’re picturing a sprawling field or a simple vase arrangement.
Composing multiple sunflowers together starts with planning basic placement before adding any detail. Lightly sketch a few circles of varying sizes across your paper to represent where each flower head will go, keeping in mind that flowers closer to the “camera” should appear larger, while those further away should be smaller. Avoid placing them in a perfectly even row or grid, since real sunflowers grow with natural, slightly random spacing.
Overlapping techniques are key to creating a sense of depth. Let some petals or leaves from one sunflower slightly overlap another, and consider having a few flower heads partially hidden behind others in the foreground. This layering technique immediately makes a composition feel more three-dimensional rather than flat and evenly spaced.
Background and setting ideas can further enhance a multi-flower composition. For a field scene, add a simple horizon line, a few loosely sketched clouds, and rows of stems fading into the background with less detail than your foreground flowers this creates atmospheric depth. For a bouquet or vase arrangement, sketch a simple container shape first, then build your sunflowers upward and outward from that base, varying the angle of each stem slightly so the bouquet doesn’t look stiff or artificial.
Whether you’re drawing a wild field or a curated bouquet, varying flower size, angle, and level of detail between foreground and background elements is what makes a multi-sunflower composition feel believable.
Common Mistakes to Avoid
Even with a clear step-by-step process, a few recurring mistakes can hold a sunflower drawing back from looking its best.
Overly uniform petals are one of the most common issues. When every petal is drawn at exactly the same length, width, and angle, the flower can start to look stiff and artificial rather than organic. Real sunflower petals vary slightly, so intentionally mixing up their size and spacing actually makes the drawing look more accurate, not less.
A stem that’s too thin is another frequent mistake, especially among beginners used to drawing more delicate flowers. Sunflower stems are notably thick and sturdy in real life, built to support a heavy flower head, so a thin, wispy stem tends to look disproportionate and unconvincing.
Missing center texture can leave a sunflower looking flat and unfinished. The seed head is one of the most distinctive parts of the flower, so skipping the spiral or curved-line texture inside the center even a simplified version removes a lot of what makes the drawing instantly recognizable as a sunflower.
Poor proportion between the flower head and the rest of the plant is another common pitfall. A flower head that’s too small compared to a long stem (or vice versa) throws off the entire drawing’s balance and can make it look unnatural.
Over-erasing or smudging guidelines rounds out the list. Pressing too hard with initial guide shapes makes them difficult to fully erase later, sometimes leaving visible indentations or smudges that distract from the finished piece. Keeping early guidelines light prevents this issue entirely.
Tips for Realism & Improvement
A few intentional habits can noticeably improve your sunflower drawings over time, whether you’re aiming for realism or just want more confident, consistent results.
Using reference photos effectively is one of the most valuable habits you can build. Rather than glancing at a photo once and drawing from memory, keep the reference visible throughout the entire process, checking it regularly for petal shape, curve direction, and how light falls across the flower. Comparing your drawing to the reference at each stage not just at the end makes it much easier to catch and correct proportion issues early.
Practicing petal variation deliberately is worth setting aside time for on its own. Try filling a page with nothing but individual petal shapes, varying the length, width, and curve of each one. This isolated practice builds the muscle memory needed to naturally vary petals when you’re drawing a full flower, rather than defaulting to identical, repeated shapes.
Adding shadow and depth cues consistently is what separates a flat sketch from a dimensional one. Beyond basic shading, consider how petals in the back of the flower might sit slightly in shadow compared to petals catching direct light in the foreground, and let your seed head texture darken slightly toward its edges.
Practicing from observation versus memory produces very different results. Drawing from memory is great for quick doodles or stylized work, but sketching directly from a real sunflower or high-quality photo regularly will sharpen your eye for proportion and detail far faster than repetition alone.
Sunflower Drawing for Kids
Sunflowers are one of the most kid-friendly flowers to draw, thanks to their bold, simple shapes and forgiving proportions making this a great activity for young beginners.
Simplified steps work best for kids, focusing on just the essentials: one circle for the center, one layer of simple oval petals, a single thick stem, and one or two basic leaves. Skipping details like a second petal layer, vein textures, or precise shading keeps the process quick and manageable, especially for younger children with shorter attention spans.
Easy shapes and forgiving techniques make sunflowers especially approachable for kids who might get frustrated with more complex flowers. Since petals don’t need to be perfectly even or symmetrical to still read as a sunflower, kids can draw freely without worrying about “getting it wrong” in fact, some of the most charming children’s sunflower drawings come from imperfect, uneven petals drawn with confidence.
Fun add-ons can make the activity even more engaging. Adding a simple smiling face to the center turns the sunflower into a friendly character, which younger kids often enjoy more than a strictly botanical version. A small bee buzzing nearby, a bright yellow sun in the corner of the page, or a few simple grass tufts at the base of the stem can round out the scene without adding much drawing complexity.
For classroom or at-home activities, having kids trace a simple sunflower outline first before attempting one freehand can also build confidence before moving to independent drawing.
Digital Drawing Considerations
For those who prefer drawing on a tablet rather than paper, digital tools offer some distinct advantages when it comes to sketching a sunflower along with a slightly different workflow.
Recommended apps and software for beginners typically include Procreate (iPad), which is popular for its intuitive interface and brush variety, along with alternatives like Adobe Fresco or Clip Studio Paint for those on other devices. Most of these apps work well with a stylus or drawing tablet, offering pressure sensitivity that mimics the natural feel of pencil or ink on paper.
Layering technique is one of the biggest advantages digital drawing offers over traditional media. You can sketch your initial guide shapes on one layer, draw your final petal and stem lines on a separate layer above it, and add color on yet another layer beneath your linework. This means you can freely erase or adjust your guide shapes without ever risking smudging or damaging your finished linework something that’s much harder to manage with traditional pencil and paper.
Advantages of digital versus traditional methods are especially useful for beginners still building confidence. The undo button alone removes a lot of the pressure around “ruining” a drawing, encouraging more experimentation with petal shapes, color choices, and composition. Digital tools also make it easy to resize, duplicate, or rotate elements handy if you’re drawing a field or bouquet of multiple sunflowers and want to reuse a base flower shape rather than redrawing each one from scratch.
That said, traditional pencil and paper remain valuable for building foundational skills, since the lack of an undo button naturally encourages more deliberate, careful mark-making.
Frequently Asked Questions
What shapes do you use to draw a sunflower? A sunflower breaks down into a few basic shapes: a circle for the center, a larger guide circle for petal placement, elongated ovals or teardrops for the petals, curved parallel lines for the stem, and heart-shaped or oval leaves.
How do you make a sunflower drawing look realistic? Focus on petal variation (avoid making them all identical), add spiral or curved-line texture to the center, use a noticeably thick stem, and incorporate basic shading based on a consistent light source.
How many petals does a sunflower have? Real sunflowers typically have between 20 and 40 petals, though this varies by variety. For drawing purposes, you don’t need to count precisely focus on even spacing and natural variation rather than an exact number.
What colors should I use for a sunflower drawing? The classic palette uses golden or warm yellow for petals with a brown or dark orange center and green for the stem and leaves. Sunset-inspired oranges and reds, or a monochrome palette, work well for more stylized interpretations.
Do I need to draw guidelines before starting? Yes, especially as a beginner. Lightly sketched guide circles help you place petals evenly and keep proportions balanced before committing to final lines, making the overall drawing process much smoother.
Can I draw a sunflower without any art experience? Absolutely. Because sunflowers are built from simple, forgiving shapes, they’re one of the most beginner-friendly flowers to draw no prior art experience is needed to get a recognizable result.
Final Thoughts: Practice Makes Perfect
Drawing a sunflower doesn’t require advanced artistic training just a willingness to break the flower down into simple, manageable shapes and build from there. From the initial guide circles to the final petals, stem, and leaves, each step in this process is approachable enough for a complete beginner, while still leaving plenty of room to grow into more realistic or stylized techniques over time.
The most important takeaway is that imperfection is actually part of what makes a sunflower drawing look convincing. Uneven petals, slightly varied leaf shapes, and a naturally curved stem all mirror how real sunflowers grow so there’s no need to aim for mechanical precision. Focus instead on proportion, texture in the center, and a confident, sturdy stem, and the rest will fall into place with practice.
Whether you’re sketching a single front-facing sunflower, experimenting with different angles, building out a full field or bouquet, or introducing a young artist to their first flower drawing, the core techniques covered in this guide apply across every version. The more you practice varying petal shapes and observing real reference photos, the more natural the process will feel.
So grab a pencil, start with that first light circle, and give it a try. Like most drawing skills, sunflowers get easier and more enjoyable the more you sketch them.
Give this tutorial a try and share your finished sunflower drawing in the comments below I’d love to see how yours turned out.