Halloween decorating doesn’t have to mean draining your wallet at a pop-up costume store. Some of the most memorable, envy-inducing yard displays are made from things you probably already have lying around milk jugs, cardboard, mason jars, and a little imagination. DIY outdoor Halloween decorations let you create a spookier, more personal display than anything off a shelf, all while keeping costs low.
This guide walks through everything you need to plan, build, and style your own haunted yard from budget-friendly walkway ghosts and glowing pathway lights to graveyard fences, painted pumpkins, and eerie fog effects. We’ll also cover lighting tips, weatherproofing tricks, kid-friendly projects, and how to pull it all together into one cohesive, photo-worthy display.
Whether you’re decorating a small apartment porch or transforming your entire front yard into a haunted attraction, these ideas will help you build something the whole neighborhood will remember.
Planning Your Halloween Display
Before you start gluing and painting, a little planning goes a long way toward a display that feels cohesive rather than thrown together. Start by choosing a theme: classic spooky (ghosts, tombstones, cobwebs), cute and kid-friendly (smiling pumpkins, friendly bats), a haunted graveyard, or a witchy aesthetic with cauldrons and potion bottles. Picking one direction early makes every decoration decision easier down the line.
Next, think about the budget. Dollar stores are goldmines for battery tea lights, plastic spiders, and craft basics, while craft stores are better for paint, foam board, and specialty supplies. Repurposed household items such as milk jugs, cardboard, and mason jars can cut costs even further and often look more charming than mass-produced decor.
Scale matters too. An apartment porch calls for a handful of well-placed pieces (a pumpkin display, some lanterns, a small wreath), while a full front yard can support a layered display with tombstones, fencing, and fog effects spread across the lawn.
Finally, set a timeline. Larger builds like tombstones or a graveyard fence are best started 2–3 weeks before Halloween, giving paint and glue time to dry properly. Smaller projects like milk jug ghosts or mason jar lanterns can be knocked out in a single weekend just days before the big night.
Materials & Tools Primer
Having the right supplies on hand before you start makes every project go faster and look more polished. The good news: most DIY Halloween decorations rely on items you can save from everyday use or pick up cheaply.
Household items worth saving: Start collecting these weeks in advance empty milk jugs (for ghosts), mason jars (for lanterns), toilet paper and paper towel rolls (for bats), cardboard boxes (for tombstones or signage), and old bedsheets or pillowcases (for draped ghost figures).
Basic craft supplies: A few inexpensive staples will cover most projects on this list acrylic or spray paint (black, white, orange, and gray), a hot glue gun, black yarn or cheesecloth for webs, fishing line for hanging decorations, and wooden stakes or rebar for anchoring yard pieces like tombstones.
Optional tools: For more ambitious builds, a foam cutter makes clean work of tombstone and prop shapes, while a heat gun can help shape thicker materials. A staple gun is handy for securing fabric or cheesecloth to wooden frames.
Safety gear notes: If you’re using spray paint, always work outdoors or in a well-ventilated space, and wear a mask to avoid inhaling fumes.
Stock up gradually rather than all at once. Many of these supplies are reusable year after year, so your first Halloween’s investment pays off in future seasons too.
Walkway & Entrance Decorations
Your walkway is the first thing trick-or-treaters and neighbors see, making it one of the highest-impact areas to decorate. A well-lit, spooky entrance sets the tone for your entire display before guests even reach the porch.
Milk jug ghosts are the easiest starting point along both sides of your walkway for a glowing, ghostly path after dark. Space them evenly for a clean, intentional look rather than clustering them randomly.
Mason jar lanterns add a warmer, more elegant touch. Painted with orange or black glass paint, or wrapped in jack-o’-lantern-style tape designs, they work beautifully lining porch steps or hanging from shepherd’s hooks along the path.
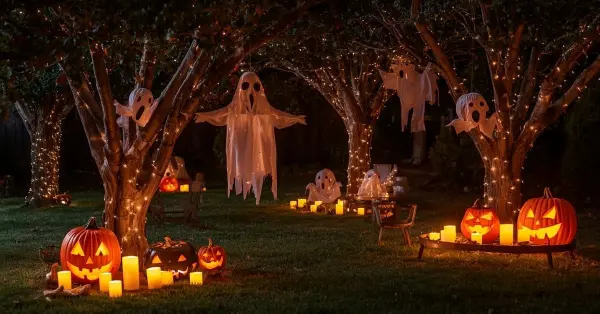
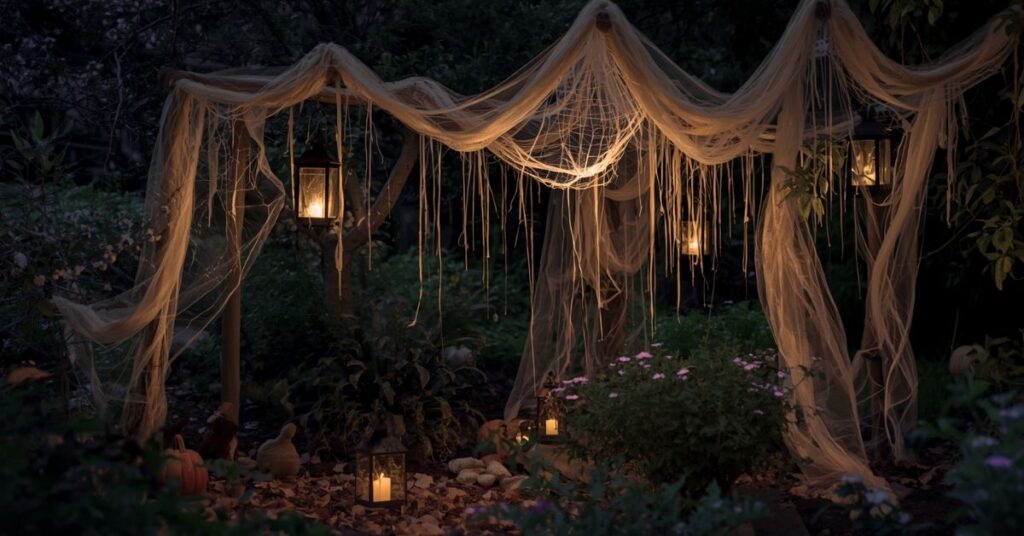
Balloon and cheesecloth ghosts make a striking entrance piece when hung just above eye level near your front door or archway. Their slightly translucent, floating appearance is far eerier in person than in photos, especially with a small fan nearby to create gentle movement.
Together, these elements create a guided, immersive path from the sidewalk to your front door exactly the kind of buildup that makes a Halloween display memorable.
Yard & Lawn Decorations
The open lawn is where you have the most room to build out a full scene. This is where a simple porch display becomes a genuine haunted yard. These projects work best spread across the grass rather than crowded into one corner.
PVC pipe or foam tombstones are the backbone of most yard displays. Arrange them in small clusters rather than a single straight row for a more natural, aged graveyard look, and vary their heights and angles slightly so they don’t look uniform or store-bought.
A graveyard fence built from foam board or thin wood pickets helps frame your tombstone cluster and gives the whole scene a sense of structure, as if marking off sacred (or cursed) ground. Even a short, partial fence around the display adds a surprising amount of polish.
Glowing eyes in the bushes are one of the cheapest, most effective yard effects. Tucked into shrubs at varying heights, they create the unsettling impression that something is watching from the darkness, especially effective along the edges of your property where shadows are naturally deeper.
A witch’s brew cauldron with dry ice fog makes for a fantastic centerpiece near your tombstones or fence. The bubbling, low-lying fog effect is dramatic in photos and genuinely impressive to trick-or-treaters walking by, especially when paired with colored lighting from below.
Layering these elements tombstones framed by fencing, glowing eyes at the perimeter, and a fogging cauldron as a focal point turns a flat lawn into a scene with real depth.
Porch & Door Decorations
Your porch is the final stretch before trick-or-treaters reach your door, and it’s often where they linger longest waiting for candy making it worth extra decorating attention.
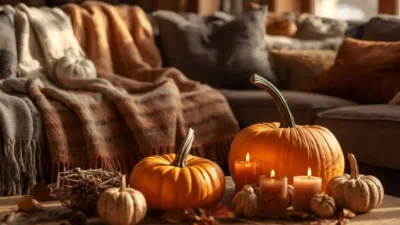
A painted pumpkin family is a porch classic that’s safer and longer-lasting than carved jack-o’-lanterns. Arrange different-sized pumpkins in a cluster on your steps, each with its own painted expression, for a display that stays fresh (not rotting) for the entire season.
Hanging bats made from toilet paper rolls are an easy, kid-friendly addition to a porch ceiling or overhang. Cluster several together at slightly different heights, hung with fishing line, to create the impression of a small colony frozen mid-flight.
Spider webs made from stretched yarn or cheesecloth work especially well across porch railings, corners, and doorways, the exact tight spaces where real spiders would build one anyway. Add a few plastic spiders of varying sizes crawling across the web for extra realism.
Finally, don’t overlook your front door itself. A Halloween wreath made from black ribbon, fake spiderwebs, or mini plastic skulls combined with a doormat or small accent sign ties the whole porch together and gives trick-or-treaters something to notice right at eye level.
Together, these porch elements create the “final approach” moment of your display, the last impression before someone reaches your door.
Lighting & Special Effects
Lighting is what transforms a daytime display into a genuinely spooky nighttime scene and it’s often the single biggest factor in how impressive a Halloween yard looks after dark.
Battery tea lights are the workhorse of most projects on this list, safe, inexpensive, and perfect for enclosed spaces like milk jug ghosts or mason jar lanterns where an open flame would be a hazard. String lights, especially in orange or purple, add ambient background glow along fences, railings, or bushes without overpowering your main decorations. Spotlights, even a simple clip-on work light with a colored gel can dramatically uplight tombstones or a cauldron from below for a theatrical, eerie effect.
Layering these light sources at different heights and intensities creates far more depth than a single light source ever could. Combine low ground-level lighting (pathway markers), mid-height ambient lighting (string lights on a fence), and a focal spotlight (on your cauldron or tombstone cluster) for a scene that feels genuinely three-dimensional after sunset.
Fog machines and dry ice add a final layer of atmosphere, but require some care. Dry ice should always be handled with gloves and kept away from direct skin contact, and fog machines work best in still, low-wind conditions to keep the effect visible rather than dispersing instantly.
For extra polish, motion-activated lights or sound effects near your walkway can startle and delight visitors as they approach.
Kid-Friendly & Family Projects
Halloween decorating doesn’t have to be a solo project; many of the best DIY decorations double as fun, low-mess activities the whole family can build together, making the lead-up to Halloween part of the fun.
Simple crafts safe for young kids include painting pumpkins (no sharp carving tools required), decorating milk jug ghosts with markers, and gluing googly eyes onto toilet paper roll bats. These projects use kid-safe materials, involve minimal cleanup, and give children a real sense of ownership over the finished display.
For families with younger trick-or-treaters in mind, it’s worth balancing your display with non-scary, cute alternatives alongside spookier elements friendly ghost faces instead of gory ones, smiling pumpkins rather than menacing carvings, and softer lighting near the entrance so toddlers aren’t startled before they even reach the door.
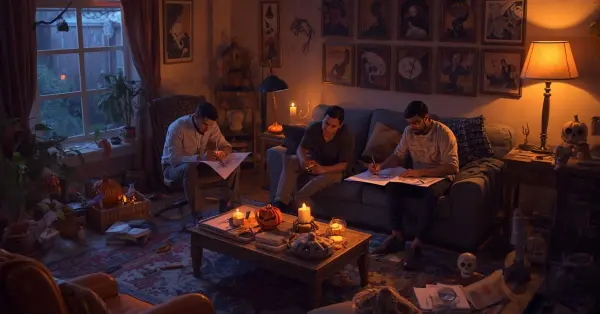
A family crafting night a week or two before Halloween is a great way to knock out several projects at once. Set up a table with paint, glue, and simple templates, let everyone pick a project, and turn decoration-making into its own Halloween tradition rather than a last-minute chore.
Involving kids in the process not only lightens your workload, it also means the finished display carries a little more meaning, since it’s genuinely handmade by the whole family rather than assembled solo.
Spooky/Advanced Projects
Once you’ve got the basics down, a few more ambitious builds can take your display from charming to genuinely frightening, perfect for decorators who want their yard to be the neighborhood’s must-see stop.
Animatronic-style props like a motion-triggered figure that jerks upright or a hand that reaches out of the ground add a jump-scare element that static decorations simply can’t match.
Realistic prop-making techniques can elevate simple pieces significantly. Techniques like layering latex or fabric over foam forms, dry-brushing paint for a weathered, aged look, and adding fake blood or grime with acrylic paint mixtures can turn a basic foam tombstone or mask into something that looks genuinely unsettling up close.
Sound effect integration is often the missing piece in otherwise-great displays. A hidden speaker playing looped creaking, whispering, or distant howling triggered by a motion sensor near the walkway adds an audio layer that makes visitors feel like they’ve stepped into a scene, not just past some decorations.
These advanced projects take more time and a bit more budget than the earlier basics, but even adding just one a single motion-activated prop or a hidden sound effect can meaningfully raise the intensity of your entire display.
Color Palette & Cohesive Styling
A display can have great individual decorations and still look cluttered or disjointed without a unifying color scheme. Committing to a palette early and sticking to it is one of the simplest ways to make a display look intentional and professional rather than thrown together.
The classic combination of black, orange, and white works for almost any theme and is the easiest to source, since most Halloween craft supplies default to these colors. For a slightly different mood, an alternative palette using purple and green leans more witchy and mystical, while a muted gray-and-black scheme with minimal orange creates a more somber, haunted-graveyard feel.
To avoid a cluttered look, resist the urge to use every decoration idea in one small area. Give each piece room to stand out; a cluster of tombstones can be its own focal point, while lanterns lining the walkway are a separate visual moment. Repeating just two or three colors throughout the whole yard, rather than introducing a new color with every new decoration, keeps everything feeling connected.
Finally, think about balancing scary and whimsical elements. A yard that’s entirely gory or unsettling can feel more off-putting than fun for families with young kids, while an all-cute display might not satisfy visitors looking for genuine scares. Mixing in a few lighthearted touches a silly tombstone epitaph, a smiling pumpkin near the door alongside your spookier centerpieces usually strikes the best balance for a neighborhood audience.
Weatherproofing & Durability
Halloween decorations spend weeks outside, often exposed to rain, wind, and temperature swings so a little weatherproofing effort upfront can save you from a soggy, sagging display by the time the big night arrives.
Outdoor-safe paints and sealants make the biggest difference for anything staying out long-term. Use acrylic craft paint labeled for outdoor use where possible, and finish painted pieces like tombstones or pumpkins with a clear waterproof sealant spray to prevent colors from running or fading in the rain.
Paper and cardboard elements are the most vulnerable to weather and generally shouldn’t be left out full-time. Items like cardboard tombstone signage or paper bats hold up far better with a few coats of waterproof sealant, but for anything that isn’t fully weatherproofed, it’s safest to bring these pieces inside overnight or during forecasted rain and only display them on clear evenings.
Wind is another factor worth planning for lightweight decorations like cheesecloth ghosts or hanging bats should be secured with sturdy fishing line or twine rather than tape, and yard stakes for tombstones should be pushed deep enough into the ground to avoid toppling in a gust.
Finally, think ahead to next year. Storing sturdier decorations (painted foam tombstones, mason jar lanterns, reusable fencing) in a labeled bin after Halloween means next year’s display can start from a head start rather than from scratch saving both time and money down the road.
Budget Breakdown
One of the biggest advantages of DIY decorating is how much you save compared to store-bought displays and knowing where your money actually goes helps you decide how far to take your project.
DIY vs. store-bought is rarely a close comparison. A single store-bought animatronic prop can easily cost $50–100, while an entire DIY walkway of milk jug ghosts and mason jar lanterns might cost under $20 total using saved household items and a few dollar-store supplies.
A budget under $50 typically covers the essentials: a pack of battery tea lights, black and orange acrylic paint, a roll of black yarn for webs, a few plastic spiders, and materials for a small painted pumpkin display enough for a modest but polished porch and walkway setup.
A $100 budget opens up more ambitious additions: foam board for a small tombstone cluster and graveyard fence, a cauldron with dry ice for fog effects, string lights for ambient glow, and sealant to weatherproof your painted pieces for the full season.
Beyond $100, spending shifts toward the advanced projects motion sensors and basic motors for animatronic props, a small fog machine instead of dry ice, or a hidden speaker system for sound effects.
The good news is that most of this spending isn’t one-time. Reusable items like foam tombstones, lanterns, and fencing get cheaper every year you reuse them, meaning your first Halloween’s investment quietly pays dividends on every display that follows.
Safety Considerations
A great-looking display isn’t worth much if it creates real hazards for trick-or-treaters, family members, or your own household. A few precautions go a long way toward keeping the fun safe for everyone.
Fire safety should be the first consideration. Whenever possible, use battery-operated tea lights and LED lights instead of real candles, especially inside enclosed decorations like milk jug ghosts or mason jar lanterns where an open flame poses a real fire risk. If you do use real candles anywhere, keep them away from anything flammable like dry leaves, paper decorations, or fabric.
Trip hazards on walkways are one of the most common and most preventable Halloween injuries. Keep pathway lighting, stakes, and decorations clear of the actual walking path itself, secure any cords running across walkways with tape or covers, and make sure lighting is bright enough for visitors to actually see where they’re stepping in the dark.
Choking hazards deserve extra attention if young kids are helping decorate or will be around the finished display. Small plastic spiders, googly eyes, and other tiny craft pieces should be securely glued rather than loosely attached, and kept out of reach of very young children both during the crafting process and once the display is set up.
Taking these precautions doesn’t mean sacrificing spookiness, it just means the scares stay in your decorations, not in an actual trip to the ER.
Photo-Worthy Display Tips
A great Halloween display deserves to be seen and a few simple styling and timing choices can make the difference between a snapshot and a genuinely shareable photo.
Arrange decorations with sightlines in mind. Think about the main angle most people will view or photograph your display from, usually the sidewalk or street and build depth toward that viewpoint, with taller elements like tombstones or fencing in the back and smaller details like lanterns or pumpkins up front. Avoid placing your best pieces where they’ll be blocked by other decorations from the most common vantage point.
Leave breathing room. A few well-placed statement pieces photograph better than a yard packed edge-to-edge with decorations. Empty space between elements helps each piece stand out rather than blending into visual clutter.
Timing matters more than people expect. The period right after sunset, often called “blue hour” is ideal for photos, since there’s still enough ambient light to see the yard’s layout, but your lanterns, string lights, and spotlights are already glowing for contrast. Full darkness can make wide shots look like a black void with a few bright spots.
A few finishing touches help too: wipe down glass jars and painted surfaces before peak trick-or-treating hours, straighten any decorations knocked over by wind or visitors, and check that all lights are working each evening before dusk.
Photo-Worthy Display Tips
Arrange decorations with sightlines in mind. Think about the main angle most people will view or photograph your display from, usually the sidewalk or street and build depth toward that viewpoint, with taller elements like tombstones or fencing in the back and smaller details like lanterns or pumpkins up front.
Leave breathing room. A few well-placed statement pieces photograph better than a yard packed edge-to-edge with decorations. Empty space between elements helps each piece stand out rather than blending into visual clutter.
Timing matters more than people expect. The period right after sunset often called “blue hour” is ideal for photos, since there’s still enough ambient light to see the yard’s layout, but your lanterns, string lights, and spotlights are already glowing for contrast. Full darkness can make wide shots look like a black void with a few bright spots.
A few finishing touches help too: wipe down glass jars and painted surfaces before peak trick-or-treating hours, straighten any decorations knocked over by wind or visitors, and check that all lights are working each evening before dusk.
Conclusion
A standout Halloween display doesn’t require a big budget or professional-grade props; it requires a plan, some basic materials, and a willingness to get a little creative with things you might otherwise throw away.
The best displays aren’t the ones with the most decorations, they’re the ones that feel cohesive, thoughtfully lit, and genuinely handmade. A consistent color palette, layered lighting, and a balance between spooky and whimsical elements will do more for your yard’s impact than any single expensive prop ever could.
Start small if this is your first year decorating a few milk jug ghosts and a painted pumpkin display are enough to make an impression. Then build from there each season, adding a new project or two as your confidence (and your bin of reusable decorations) grows.
Whatever you build this year, remember that the goal is to have fun with it. Get the family involved, embrace a little imperfection, and don’t be afraid to try something a bit ambitious. Some of the best Halloween displays started as a single weekend project that just kept growing.
Happy haunting, and enjoy the season!
FAQ Section
How much does it cost to DIY outdoor Halloween decorations? A basic walkway and porch display can cost under $20 using saved household items like milk jugs and mason jars, plus a few dollar-store supplies. A fuller yard setup with tombstones, fencing, and fog effects typically runs $50–100.
What are the easiest DIY Halloween decorations for beginners? Milk jug ghosts, painted pumpkins, and mason jar lanterns are the simplest projects; they require minimal tools, dry quickly, and use materials most people already have at home.
Are battery-operated lights safer than real candles for outdoor decorations? Yes. Battery tea lights and LEDs eliminate fire risk, especially inside enclosed decorations like jugs and jars, and hold up better outdoors since they’re unaffected by wind or rain.
How do I keep paper or cardboard decorations from getting ruined by rain? Seal them with a waterproof spray sealant, and bring especially delicate pieces inside overnight or during forecasted rain rather than leaving them out full-time.
Can I make Halloween decorations that are kid-friendly and not scary? Absolutely. Painted pumpkins with smiling faces, friendly ghost designs, and softer lighting near the entrance keep a display fun and welcoming for younger trick-or-treaters.
How far in advance should I start decorating for Halloween? Start larger builds like tombstones or fencing 2–3 weeks ahead to allow paint and glue to fully dry. Smaller projects like lanterns or milk jug ghosts can be finished in a single weekend closer to the holiday.